Showing posts with label Google Photos. Show all posts

Thursday, 28 September 2017

How to Sync Your Desktop PC with Google Drive and Google Photos


How to Sync Your Desktop PC with Google Drive and Google Photos


Google has been doing its part to make sure everyone has a backup of important data, and it recently released a new tool for Windows and Mac users to take that redundancy to the next level. Appropriately named Backup and Sync, it’s a quick and effective tool to store your important files in the cloud.

Backup & Sync Replaces Google Drive and Google Photos Uploader


Before we get into it, let’s first talk a little bit about what Backup and Sync actually is. If you’re a heavy Google user, you’re probably already aware of Google’s other sync tools: Google Drive and Google Photos Uploader. Those have both now been rolled into Backup and Sync, so you can control all of your files, videos, images, and more from one app. This is where you’ll control which folders from your Drive are synced to and from your PC or Mac, as well as specifying which image folders should get backed up to your Photos library.

Google Drive is really the core of the Backup and Sync tool, so if you never used the Drive app then a bit of explanation may be in order. Essentially, this new tool will allow you to sync your Google Drive cloud storage with your computer—be that the entire Drive or just specific files and folders. These are then treated as local files on the computer, so your important stuff is always up to date on every computer you own (and in the cloud).

The only exception here are Google Docs files (Sheets, Docs, Slides)—those are still online-only, as Backup and Sync will not download them for offline access. It will, however, put icons in the Google Drive folder so you can double-click them as if they were normal documents (you’ll just need an internet connection to view and edit them.)

How to Sync Your Desktop PC with Google Drive and Google Photos

Backup and Sync also adds one more tool to the equation: the option to back up specific folders from your PC or Mac to your Google Drive. For example, I use Google Drive to store almost everything, so it’s accessible from all of my other device. But the screenshots folder on my Windows machine isn’t in my Drive folder—it’s in my PC’s Pictures folder. With Backup and Sync, I can then access folder on any of my other devices, any time.

Sound awesome? It is. Here’s how to set it up and get everything synced.

Step One: Download and Install Backup and Sync

Naturally, the first thing you’ll need to do is actually download the Backup and Sync tool. Make sure to grab the appropriate download for your device (Mac or PC). If you already have Google Drive installed, don’t worry—this tool will automatically replace it, no uninstallation necessary.

It should download pretty quickly, and you’ll just need to launch the installer when it’s finished. If you’re using Google Chrome (as you should be), just click the download button at the bottom of the page.

A few seconds later, Backup and Sync will be installed. When it was finished, mine told me to restart my computer for reasons unknown to me—I didn’t do it, and everything still worked fine. Take that, Google.

If you previously had the Google Drive app installed, Backup and Sync should automatically log in to your Google Account. If not, you’ll need to log in. After that, a quick splash screen will let you know what the app is all about: backing up your stuff. Click “Got it” to move into the app.

How to Sync Your Desktop PC with Google Drive and Google Photos

Step Two: Choose Which Folders Will Get Synced from Google Drive

The Backup and Sync tool is split up into two main sections:

* Google Drive: This performs the same function as the original Google Drive app. You choose what folders to sync from your Google Drive cloud storage, and they’ll appear in a Google Drive folder on your PC. Anything you put into that folder will also sync to Google Drive.

* My Computer: This part is new, and allows you to sync files between your computer and Drive without putting them in the dedicated Google Drive folder. Just pick the folders from your computer you want to sync, and they’ll sync to your cloud storage (though they’ll appear in a separate section of the Google Drive interface, rather than with all your other Drive files.)

Let’s start with the Google Drive section first—it’s second in the list, but it’s much simpler and will be familiar to anyone who’s used Google Drive in the past.

You have a few specific options in this menu. You can:

* Sync My Drive to this Computer: Use this option to enable/disable syncing your Google Drive to your computer.

* Sync Everything in my Drive: Literally syncs the entire contents of your Google Drive to your computer.

* Sync Only These Folders: Allows you to specify which folders to sync from Drive to your computer.

These are really straightforward—just choose what you’d like to sync and be done with it.

How to Sync Your Desktop PC with Google Drive and Google Photos'

Step Three: Choose Other Folders On You PC to Sync

Next, let’s look at the My Computer section, where you can select other folders on your PC to sync. There are a few options already available here: Desktop, Documents, and Pictures. You can simply tick the box next to the option to completely back up everything from that location to your Google Drive. Simple.

How to Sync Your Desktop PC with Google Drive and Google Photos

But if you’d like to get a little more granular and only back up a certain folder, you can do this by clicking the “Choose Folder” option. Just navigate to the folder you’d like to back up, and click “Select Folder.” That’s all there is to it.

NOTE: Files you sync from outsdie your Drive folder won’t show up in Drive alongside all your other files. To access those files, head to Google Drive on the web and click on “My Computers” in the left menu. This option is also available in the Drive mobile apps.

How to Sync Your Desktop PC with Google Drive and Google Photos


If you want a file or folder to show up under “My Drive”, you’ll need to sync it the old-fashioned way: by putting it inside the Google Drive folder on your PC.

Step Four: Tweak Your Photo Uploading Settings

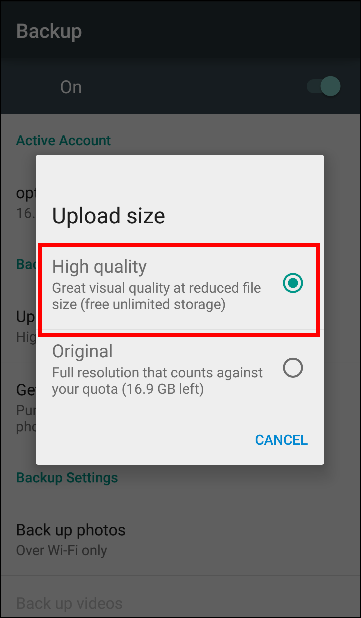
Below the folder options in the “My Computer” section, you can also specify how you’d like to back up images (if you choose to back up images from your PC, of course): Original Quality, which will take up space in your Drive, or High Quality, which won’t take up any space in your Drive. The latter uses intelligent compression algorithms to shrink the size of the image without reducing quality, the same as it does in the Google Photos app on Android and iOS devices.

You can also specify how you’d like to control delete options: Remove Items Everywhere, Don’t Remove Items Everywhere, or Ask Me Before Removing Items Everywhere. The last option is set as the default, which really makes the most sense anyway. Feel free to change this according to your specific needs.

How to Sync Your Desktop PC with Google Drive and Google Photos


Lastly, you can tick the box in the Google Photos section to automatically scan your computer for new pictures and upload them to Google Photos. There’s also a small option at the bottom labeled “USB Devices & SD Cards,” which you can use to automatically upload files from your digital camera or USB drives if you’d like. Just plug in the drive or card and specify what you’d like to do with it.

A Few Additional Notes about Backup and Sync

That’s really all there is to Backup and Sync, but there are a couple of other things worth mentioning:

* You can rename your computer by clicking on the “My Computer” (or similar) text at the top of the “My Computer” page and giving it a specific name.

* You can easily upgrade your Drive storage or disconnect your account from the “Settings” tab.

* System startup rules, file sync icon, and right click settings can also be modified on the Settings tab.

* Backup and Sync’s network activity can be restricted in the “Network Settings” section of the Settings tab. Proxies can be specific, and download/upload rates capped if need be.

* The Backup and Sync tool will live in your computer’s system tray as long as it’s running. To access its settings, just click its icon in the tray, click the three-dot menu in the upper right corner, and choose “Preferences.”

How to Sync Your Desktop PC with Google Drive and Google Photos

That’s pretty much it, really. It’s a simple tool.

Thanks for landing on this post, If you like my post then give your opinion and feedback in comment box.


TAGS:- #How to Sync Your Desktop PC with Google Drive and Google Photos, #spotify not syncing local files, #How to Sync Your Desktop PC with Google Drive, #how to sync your desktop with dropbox, #how to sync your desktop with onedrive, #how to sync your local file with dropbox, #how to sync your local file with google drive, #How to Sync Your PC with Google Drive and Google Photos, #local files sync to spotify, Local Files Syncing, Desktop Files Syncing, #Your Desktop PC with Google Drive and Google Photos

Wednesday, 16 August 2017

10 Things You May Not Know You Can Do With Google Photos


Google Photos may seem like a simple image hosting service, but it’s actually quite powerful. Google Photos bridges the gap between cloud storage, image hosting, and image sharing services, giving stiff competition to Flickr, iCloud, Dropbox, and OneDrive.

You probably know that Google Photos can back up photos from your Android or iOS device, and that you can access it from the web to view your library. You probably even know that Google Photos provides free unlimited storage when you opt for their “high quality” setting (which means photos up to an ample 16-megapixel limit and HD videos up to 1080p). Any higher than that, and it’ll count toward your Google Drive storage. Though most of the features and services bundled with this application have been discussed for a while, here are some beyond-the-basics tricks you may not have known about.

Search for People, Places, and Objects

Google Photos will automatically arrange your uploaded pictures by location and by date taken. Using advanced image recognition and Google’s large database of information, it can recognize the subject of your photos quite easily. Search your photos for anything: a wedding you attended last month, pictures you took during holidays, pictures of your pets, food, and much more. At the bottom right, touch the search icon and from the box, type what you want to find–like food, cars, or your pet and touch “Enter” or “Search.”

Things You May Not Have Known Google Photos Can Do

The Google Photos app uses some complex image processing techniques to group photos together. The auto-grouped photos are shown in the main search interface. The categories you’ll see here depends upon what you take pictures of. These groups could be the places you visit, people you know, or objects such as food, cars, bikes, and more. At the top, you’ll see several Faces that Photos app has spotted in your uploaded pics.

Group Similar Faces Together and Label Them

Google Photos creates models of the faces in your photos in order to group similar faces together. That way, you can search your photo library for photos of certain people (like “Mom” or “Jenny”). Face groups and labels are private to your account, and won’t appear to anyone you share the photos with. To create a label for a face group, tap “Who is this?” located at the top of a face group. Enter a name or nickname (or choose from the suggestions). After you label a face group, you can search with that label using the search box.

Things You May Not Have Known Google Photos Can Do

If you wish to change or remove the label name, then tap the “Options” menu and choose “Edit or Remove name label.”

If there’s more than one face group for the same person, you can merge them. Label one of the face groups with a name, then label the other face group with the same name. When you confirm the second name, Google Photos will ask you if you want to merge the face groups. Face grouping is on by default, but you can stop grouping similar faces together in “Settings.” At the top left, tap or click the hamburger menu. Next to “Group similar faces,” turn the switch off. When you turn off this setting, it will delete all the face groups in your account, the face models you created for those groups, and any labels you created.

Delete Photos After Uploading Them

If you’re going to upload your photos to the cloud, why keep them on your phone? Google Photos can automatically remove images and videos from your phone once it uploads them, eliminating redundant copies of the photo. Previously, this feature was activated only if you’ve set the app to back up “Full original resolution” images, which costs you storage on Google Drive. But now it’s available “High quality (free unlimited storage)” too. Google Photos’ “Assistant” feature will prompt you to delete images from your phone when the storage space gets low. If you accept the prompt, it will give information on how much space you can free up if you delete images and videos on the device.

Things You May Not Have Known Google Photos Can Do

If back up and sync is always turned on, then you can manually delete local copies of your photos and videos too. At the top left, touch the hamburger menu and choose “Settings.” Touch “Free up device storage” to remove original photos and videos from your device that are already backed up.

Back Up Photos From Other Apps

Google Photos’ auto-backup is handy, but by default, it only backs up photos taken with the default Camera app. If you want to also back up photos you took in Instagram, WhatsApp, Viber, and other similar Android apps, you can do so. You just need to know where those apps store the photos they take.

Open the Google Photos app on your Android phone, and tap on the hamburger menu icon in the top left corner. Select “Device Folders” from the menu that appears. You’ll notice different folders holding images from various apps like Facebook, Instagram, messaging apps, and Screenshots. Chose which folders to include or exclude from the backup process. If you don’t want to clutter your Google Photos storage with screenshots, for example, you can leave that folder turned off. And if you want all those cute filtered Instagram images, tap the cloud icon and it’ll scan that folder in the future.

Things You May Not Have Known Google Photos Can Do

Alternatively, go to “Settings > Back up and sync,” touch “Choose folders to back up…” and select the folders you want to back up. Note that this setting is available only on Android devices.

Pinch to Change View

You probably know you can pinch to zoom in and out of a picture, but there’s more to it with Google Photos. By default, the app shows your images in a daily view with thumbnails arranged chronologically, but there are a number of other options such as monthly view and “comfortable” view, which makes the photos full-width on the screen. You can move between the views simply by pinching in or out on your device’s screen. You can even pinch in on an image in a view to open it in as an individual image, and pinch out on a full-screen image to go back to the image list. Swiping up or down on the full screen image will have the same effect.

Things You May Not Have Known Google Photos Can Do


Select Multiple Photos With a Single Tap

Imagine having to select a hundred photos from your gallery and tapping on your screen a hundred times. Talk about tedious! Thankfully, Google Photos allows you to select multiple photos at a time. While viewing images in the Google Photos app, long-press on any photo to start selecting the photos. Then without lifting your finger, drag upward, downward, or sideways. This process will allow you to quickly select a series of photos without having to lift your finger. On the web, you can do the same thing by holding down the Shift key.

Undelete Photos

Let’s say you got a little trigger happy with the above gestures and accidentally deleted the wrong photos. Or perhaps you just changed your mind after hitting the Delete button. Google Photos will hold on to those images for at least 60 days in the trash. All you have to do is navigate to the trash folder, touch and hold the photo you want to undelete, and tap the restore arrow in the top right-hand corner. You can also delete those images permanently from the trash: just mark those images you want to get rid of and select the delete icon again.

Note: If you delete a photo or video and it appears to come back (without restoring it), try using your device’s Gallery app to delete it. The photo or video you tried to delete might be on a removable memory card in your device.
Things You May Not Have Known Google Photos Can Do

Upload Faster with the Desktop Client

Google Photos automatically uploads photos from your phone, but it also has desktop uploaders for Windows and Mac OS X. You can also drag-and-drop folders from your desktop to photos.google.com, and they’ll be uploaded instantly. This is useful if you’re uploading a large number of photos, and want a faster upload speed than your cellular carrier offers. The desktop uploaders can also automatically upload photos from digital cameras and SD cards when you plug them in, which is great if you take photos on something other than your phone.

Show Photos on a TV with a Chromecast

If you have a Chromecast, then you can display your photos and videos on a big screen. Install the Chromecast app for Android or iOS and make sure that your devices are on the same Wi-Fi network as your Chromecast. At the top right, touch the “cast icon,” and select your Chromecast. Open a photo or video on your device, and click the “cast icon” to display it on your TV. Swipe the photos, and you’ll see the change happening on your TV as well. If you’re on a PC or Mac, you can cast photos and videos from the Chrome browser to your TV, too. Just install Google Cast extension and follow the on-screen instructions.

Things You May Not Have Known Google Photos Can Do

Download All Your Photos at Once

Unlike Dropbox, Google Photos’ desktop uploader is a one-way client. You can’t directly download all your photos from it. If you want to download all your media from Google’s servers in eone fell swoop, then you can do so with Google Takeout. Log in to your Google account and head over to the Google Takeout page. Select “Google Photos” and select the albums you’d like to download. Now you can download all the media as a ZIP file without having to tediously select each individual image in the Google Photos gallery.

Things You May Not Have Known Google Photos Can Do

Monday, 14 August 2017

How to Use Windows 10’s Built-In Photos App

How to Use Windows 10’s Built-In Photos App

As a fairly versatile operating system, Windows has always had ways of browsing and viewing photos. But with Windows 10, Microsoft decided to try and mash browsing, organizing, and viewing all together in one application, with some basic editing to boot. The result, the innocuously-titles “Photos” app, can be less than intuitive.

Here are all the different things you can do with the Photos app… assuming you want to.

Starting Photos and Setting Defaults

Starting up the Photos app is pretty simple: for most new machines and fresh installations of Windows 10, it’s already in the Start menu as a big tile. Even if it’s not, just press “Start” and then begin typing “photos” to bring it up quickly via search.

The Photos app is already set up as the default image viewer in Windows 10. If something else has taken over those duties, it’s easy to reset the status quo: press the “Start” button, type “default,” then click the first search result, “Default app settings.” Under “Photo viewer,” click the “Photos” icon.

How to Use Windows 10’s Built-In Photos App

Browsing Photos

The Photos app offers three different interfaces when looking for photos: Collection, Album, and Folders. You can choose any of the three at any time by clicking the relevant tab, above the main interface and below the “Photos” application label.

“Collection” is a view of your most recent photos and screenshots, displayed in reverse order by date. “Albums” is a series of automatically-created photo albums, organized according to the Photo app’s internal logic, though you can add your own and remove or add photos to existing albums.

How to Use Windows 10’s Built-In Photos App

And “Folders” is merely a tab for all of the photos on your machine in specific folders—your OneDrive photo folder and your assigned “Pictures” folder in Windows, by default. To add folders to this view, click “Choose where to look” to go to the Photos Settings page, then click “Add a folder” to manually select one in Windows Explorer.

Within the main viewer of “Collection,” and in the nested album or photo viewers of the other tabs, a series of controls appear on the upper-right portion of the interface. These allow you to select multiple items for a specific action like copying, printing, or adding to a specific album, or to start a slideshow, refresh the current file view, or import from a camera or mobile device. Contextual items in the Album view allow you to edit the name of the album or change the cover photo.

To navigate backwards through the Photos interface, click the left-pointing arrow in very top upper-left of the window, or press the Esc or Backspace keys at any time.

Using the Photo Viewer Interface

When you finally get down to an individual photo, the interface goes completely black and dedicates the maximum length or width of the window. If you’re using mouse navigation, scrolling up or down will advance or retreat in the current collection, album, or folder. Hold down the “Ctrl” button on your keyboard to turn the mouse wheel into zoom or retract controls.

How to Use Windows 10’s Built-In Photos App

On the bottom of the interface, manual arrow controls to go forward or back in the album are on either side of an “add to album” button and a Delete button. You can use the keyboard for both actions: Ctrl+D to add it to a specific album via a pop-up menu, or simply press the Delete button. If you press “Delete” again, the image will be removed both from the album/collection/folder in the Photos app, and the file itself will be deleted in Windows Explorer and sent to the Recycling Bin. Tread carefully.

The top controls are labelled, and fairly self-explanatory. The “Share” button will open Windows 10’s share menu, allowing the user to send the file via email, copy it via Windows’ standard copy and paste function, or open and share it directly in any compatible Windows Store app. Zoom opens a manual slider to zoom in and out—remember that you can do this much faster by holding the Ctrl button and using the mouse wheel. “Slideshow” will begin a full-screen slideshow of the current album, collection, or folder.

The “Draw” command allows you to write on the image, with a selection of pen and eraser tools that appear contextually. It’s mainly intended for pen-enabled devices like the Microsoft Surface. You can double-click on any of the tools in the upper bar to select color and width. Note that the drawings can be erased with the Eraser tool, but after you click “save” (the floppy disk icon) and see the “Letting your Ink Dry,” the original file for this photo is saved over. Don’t click “save” on a photo unless you have it backed up somewhere, or you’re willing to lose the original.

How to Use Windows 10’s Built-In Photos App

“Edit” opens the photo editor, which we’ll cover in the next section. “Rotate” will rotate the image clockwise; if you hit it by accident, just click it again three more times to return the photo to its original orientation. At any time you can right-click on the image itself to open up most of these items in a menu.

Using the Built-In Photo Editor

The editor in Photos isn’t exactly incredible, but it can handle some light cropping and adjusting if nothing else is available. On the main interface, using the + and – buttons will zoom in and out, which can also be done with the mouse wheel (no Ctrl button necessary). Click and drag any part of the image to move it around, or click the “Actual size” button (the box with corners in the lower-right) to see the whole photo maximized horizontally or vertically.

The Crop and Rotate Tool

How to Use Windows 10’s Built-In Photos App

The “Crop and rotate” button is the most prominent tool, as it’s visible at all times. Click it to open a dedicated cropping UI. You can click and drag the circles on the corner to manually select a cropping box, or click the “Aspect ratio” button to choose a standard size. This is quite useful if you want your image to be viewed on semi-standardized devices, like a smartphone or TV (16:9), iPad (4:3), or a corporate projector (usually 4:3 as well). The “Flip” button will flip the image horizontally, but not vertically, and the “Rotate” button will spin it clockwise by 90 degrees. To get a non-square rotation, click the circle beside the right-hand menu and slide it up or down. When  you’re finished, click “Done” to return to the full Edit interface.

The Enhance Tab

How to Use Windows 10’s Built-In Photos App

Right below the Crop button are two tabs, “Enhance” and “Adjust.” Let’s look at Enhance first. The “Enhance your photo” tool is an all-in-one slider: click and  drag the slider from left to right to apply automatically-selected filters to “enhance” the image, according to the Photo app. You can stop it at any point along the axis. Generally this tool brightens up an image, smooths out shadows and highlights, makes a more ideal contrast, and just generally makes things look clearer.

The rest of the “filters” on the Enhance tab work the same way: click one of the filters, then click the slider beneath “Enhance your photo” to apply the effect, with a left-to-right strength of 0 to 100. You can apply multiple effects by clicking on a new one and then adjusting the slider—rinse and repeat. When you’re done, click the “Adjust” tab.

The Adjust Tab

The controls for this page are fairly similar, but you can adjust multiple factor at once. The “Light” sliders adjust the contrast, exposure, highlights, and shadows of the image, with the master “Light” slider being a combination of all four. The “Color” slider handles saturation, with 0 reducing the image to greyscale and 100 making it overly vibrant. More fine controls can be applied with the Tint and Warmth sliders.

The separate “Clarity” slider will outline specific edges with darkened shadows or blend them into the background, and the “Vignette” slider will add a white (left) or black (right) vignette effect to the photo.

How to Use Windows 10’s Built-In Photos App

Finally, the Red Eye tool will let you click on a subject’s eyes to remove the red glare from a camera flash, and the “Spot Fix” tool will let you click and drag around a specific area to obscure fine details. It’s good removing acne and other blemishes.

Saving Your Edits

When you’ve edited your image to your liking, you have two options: “Save” will overwrite the original image file (not recommended), or “Save a copy” will let you save the edited version to a folder in Windows Explorer. The second is obviously better, unless you’re absolutely sure you don’t want the original. At any time during editing, you can click “Undo all” to return to the original image and start over.

It’s no Photoshop, but it’ll get a simple crop or adjustment done in a pinch.

Tuesday, 6 June 2017

Add OR Remove a Printer

To print, you need to connect a printer directly to your computer (when it is connected in this way, it's referred to as a local printer), or create a connection to a network or shared printer.

* To add a local printer * To add a network, wireless or Bluetooth printer  *To remove a printer

1. To add a local printer

First, connect the printer to your computer following the manufacturer's instructions. Windows will attempt to automatically install the printer. If Windows can't automatically install it, or if you've previously removed the printer and want to add it again, follow these steps:
  1. Open Printers by clicking the Start button , clicking Control Panel, clicking Hardware and Sound, and then clicking Printers.
  2. Click Add a printer.
  3. In the Add Printer Wizard, select Add a local printer.
  4. On the Choose a printer port page, make sure that the Use an existing port option button and the recommended printer port are selected, and then click Next.
  5. On the Install the printer driver page, select the printer manufacturer and model, and then click Next.

Notes

  • If your printer is not listed but you have the manufacturer's installation CD, click Have disk, and then browse to the folder where the printer driver is stored. For help, refer to the manufacturer's instructions.
  • If you don't have the installation CD, click Windows Update, and then wait while Windows checks for available drivers.

  1. Complete the additional steps in the wizard, and then click Finish.

Tips

  • It's a good idea to print a test page to check if the printer is working correctly. For more information, see Print a test page.
  • If you have added a printer but are unable to use it, your printer driver might not be compatible with Windows Vista. Check the printer manufacturer's website for the latest compatibility information and driver updates. For more information, see Find and install printer drivers.

2. To add a network, wireless or Bluetooth printer

Before you begin, make sure you know the name of the printer that you want to add. Sometimes the name is displayed on the printer itself. If the name is not on the printer, contact the printer owner or your network administrator to find out the printer's name before following the steps below.
  1. Open Printers by clicking the Start button , clicking Control Panel, clicking Hardware and Sound, and then clicking Printers.
  2. Click Add a printer.
  3. In the Add Printer Wizard, select Add a network, wireless or Bluetooth printer.
  4. In the list of available printers, select the one you want to use, and then click Next. If your computer is connected to a network, only printers listed in Active Directory for your domain are displayed in the list.
  5. If prompted, install the printer driver on your computer.  If you are prompted for an administrator password or confirmation, type the password or provide confirmation.
  6. Complete the additional steps in the wizard, and then click Finish.

Tips

  • Available printers can include all printers on a network, such as Bluetooth and wireless printers or printers that are plugged into another computer and shared on the network. Make sure that you have permission to use these printers before adding them to the computer. For more information, see What are printer permissions?
  • It's a good idea to print a test page to check if the printer is working correctly. For more information, see Print a test page.

3. To remove a printer

Note

  • You can't remove a printer if you have items in the print queue. If items are waiting to print when you try to remove a printer, Windows will wait until printing is complete, and then remove the printer. If you have permission to manage documents on the printer, you can also cancel all print jobs and then try to remove the printer again. For more information, see Cancel printing and What are printer permissions?
  1. Open Printers by clicking the Start button , clicking Control Panel, clicking Hardware and Sound, and then clicking Printers.
  2. Right-click the printer that you want to remove, and then click Delete.
    If you can't delete the printer, right-click it again, click Run as administrator, and then click Delete.  If you are prompted for an administrator password or confirmation, type the password or provide confirmation.

Tip

  • To add a shortcut to Printers to the Start menu, right-click the Start button , click Properties, and then, on the Start Menu tab, click Customize. Select the Printers check box, and then click OK.

Tuesday, 9 May 2017

How to Enable Facial Recognition in your Google Photos

Facial recognition is available inside Android, iPhone, iPad and the web version of Google Photos but if you are not seeing it in your account yet, it is probably because you are accessing Photos from outside the United States.

A footnote on the Google Photos website says that “[Facial recognition] feature isn’t available in all countries,” probably due to privacy laws, but there’s a simple workaround that will help you bring face detection in your Google Photos, no matter where you are.


1. Go to your Android phone settings, select “Apps”, then select “Photos” under the “Downloaded” section and click the “Clear Data” button to reset your Google Photos app.

2. Go to the Google Play store and download TunnelBear or Hola or any of your favorite VPN apps.

3. Open the VPN app and connect. It will essentially trick Photos into thinking that you are connecting from US, a country that is supported by Google Photos for facial recognition.

4. Open the Google Photos app, scroll past the wizard screen and then under Settings, enable the option that says “Group Similar Faces – Auto Group photos by matching faces.”

That’s it.

Disable, or even uninstall, the VPN app, launch Google Photos again and tap the blue search button. You should see a list of faces that Google Photos was able to detect from your uploaded photos. And the feature will automatically become available on photos.google.com as well.

Related Posts Plugin for WordPress, Blogger...

Labels

404 AdBlock Add-on Airtel GPRS Trick Airtel SMS Trick Alexa Amazon Amazon Kindle Amazon Prime Android Android 8 Android Oreo antivirus Apple Apple Mac ASCII Audacity Audio Authotkey Backup Balance Transfer in Vodafone Battery Bing Blogger Blogging Bookmarklet Browser Camera Chromebook clock Cloud colors command lines Computer Computer Tricks configuration Contact Creative Commons Credit Card CSS devolop DIY Doodle DOS Download Dropbox E-Mail eBook Email Email Attachment Embed Encryption English Error Evernote Eyes Facebook Facebook Tricks Feedburner Flipkart Font Foursquare Free Internet Free sms trick in Vodafone G Mail Gadget Game Getty Images GIF Gists Github Google Google AdSense Google Analytics Google Apps Google Chrome Google Contacts Google Currents Google DNS Google Docs Google Drive Google Earth Google Font Google Forms Google Images Google Map Google Photos Google Play Store Google Plus Google Print Google Reader Google Script Google Sheets Google Spreadsheet Google Translate GPRS Setting GPS Hacking Health App HelloFax Hindi Hoodie HTML Icons idea Image Editing Images IMEI Indian Railways Infographics Instagram Internet Internet Explorer Internet Tricks iOS iPad iPhone IRCTC iTunes iTV JavaScript JioCinema JioTV Junglee Kindle Language Translation Laptop Laptop. TV Life Time FREE GPRS Life-Style Link Linkedln Linux logo Make Money Online Microdoft Powerpoint Microdoft Word Microsoft Office Microsoft Outlook Mobile Mosaic Music Name Networking nexus Notepad OCR Online Shopping Open DNS OS Outlook Password PDF Petya Phillips Hue Lights Photogtraphy Pixel Play Station Podcasts Pokemon Pokemon Go Polls Print Productivity Proxy Server Pushbullet QR Code Ransomware Reddit Reliance Hack GPRS Reliance Jio RGB Ringtone Router RSS Safe Mode Samsung Galaxy S Scrabble Screen Capture Screen Sharing Screencast Secrets Security Send free sms from PC SEO Sierra Skype Slideshare SMBv1 SMS Snapchat Snapdeal Social Media Solution Sound Device Speech Recognition Sql Steam Sync Synology NAS Tata Docomo GPRS trick Teleprompter Torrent Trick Tricks TV Twitter UltraISO Unicode Unknown Extension Unlimited 2GB Unlimited 3GB Unlimited GPRS USB USB Security Key Video Editing virtual desktop Virus attack VLC Vodafone 110% working trick for GPRS Vodafone 3g Vodafone GPRS VPN wallpapers WannaCry Web Design Web Domain Website Wget Whatsapp WiFi Wikipedia Windows Windows 10 Windows 10 S Windows KN Windows Tricks windows updates Winows N Wolfarm Alpha WordPress XBox YouTube Zip
Twitter Delicious Facebook Digg Stumbleupon Favorites More