Showing posts with label Google Map. Show all posts

Wednesday, 2 August 2017

How to Avoid Toll Roads in Google Maps

How to Avoid Toll Roads in Google Maps

No one likes to pay to be able to drive on a specific road, especially if you’re just passing through. Thankfully, Google Maps has an easy way to bypass toll roads when using navigation.

Aside from just toll roads, Maps can also bypass highways if you’d prefer the scenic route, and avoid ferries if that can be a problem where you live. The only issue here is that avoiding these modern conveniences will almost definitely increase your mileage and drive time, but if you’re okay with that (and plan ahead) then it’s definitely worth the extra hassle to make your day a little bit better.

There isn’t a generalized setting for this, but instead it has to be done once you’ve set your navigation location. So, to get started, fire up Google Maps and input where you want to go.

Before you tap that start button, however, you’ll need to tap the three dot overflow button in the top right corner.

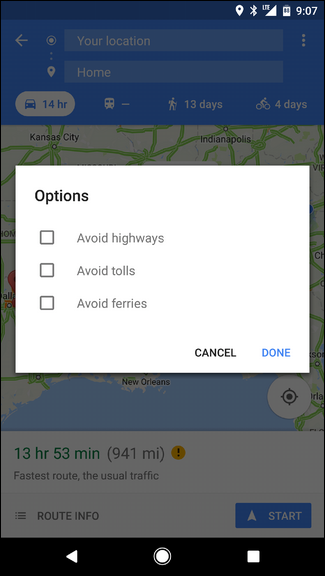
From there, choose “Route Options.”

How to Avoid Toll Roads in Google Maps

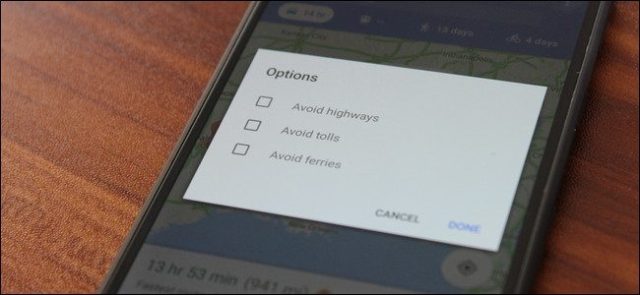
Boom: there are your options. You can easily avoid tolls, highways, or ferries with the simple tick of a box. And once you’ve set this option, it will remain enabled for future navigation until you turn it off.

How to Avoid Toll Roads in Google Maps

Of course, if you have a long way to travel or live in an area with a lot of toll roads, the financial savings may end up being a wash—what you save in tolls, you’ll likely end up spending in gas. But if it’s worth it to you, I say go for it.

How to View and Delete Your Google Maps History on Android and iPhone

How to View and Delete Your Google Maps History on Android and iPhone

If you’re anything like me, you use Google Maps a lot. The thing is, it keeps a detailed history of everywhere you’ve been—regardless of whether you’ve used navigation or not. Here’s how to delete that data.

Maps keeps your travel history in a couple of different places: “Your Timeline” and “Maps History.” The former is a very detailed look at everywhere you’ve been, even if you didn’t navigate there (yes, your phone is tracking your every step). The latter, however, is only places that you’ve used navigation to get to. It’s actually kind of confusing that they store this data in two different places, so that’s why we’ll cover both of them.

How to Edit or Remove Individual Entries from Your Google Maps Timeline

I’m using Android here, but the steps are the same for iOS, so you should have no trouble following along. To access Your Timeline—the detailed history of everywhere you’ve been, even places you didn’t navigate to—open Maps, then slide open the left menu. You can do this by swiping in from left to right or tapping the three lines in the top left corner. Select “Your timeline.”

How to View and Delete Your Google Maps History on Android and iPhone

The default view is a mini-map at the top and a quick look at your most recent locations down below. To edit (or remove) any of these locations, just tap on its entry.

From here, you can edit it by taping the “Edit” button, which will allow you change the times and specify the exact location if it’s not accurate.

How to View and Delete Your Google Maps History on Android and iPhone

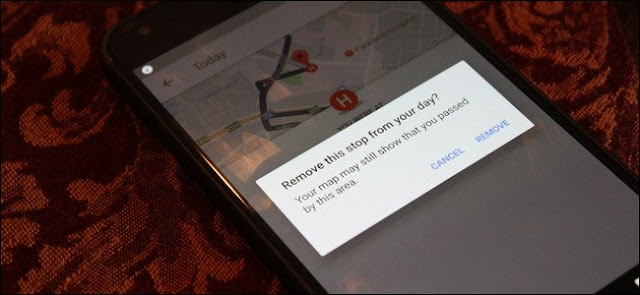
Otherwise, to delete the entry, just tap the trash can icon in the upper right corner. To completely remove it, you’ll just need to verify that you want it gone but tapping “Remove” on the pop up dialog.

How to Stop Google From Tracking Your Location History (and Delete It All)

You don’t have to just delete entries on a one-by-one basis, though. You can actually go a step further control how Your Timeline works and delete all your data if you want.

In the Your Timeline view, tap the three dots in the upper right corner, then choose “Settings.”

How to View and Delete Your Google Maps History on Android and iPhone

So this is where things can get a little more convoluted, depending on what you’re trying to do. It’s actually kind of difficult to completely disable Your Timeline, because doing so could negatively affect other aspects of navigation. But if that’s what you want to do, scroll to the bottom of the Timeline Settings page, and disable the “Location History is on” option.

You can either disable it on that particular device or just in general—just hit the appropriate slider. The top one will disable all Location History tracking across all devices, while the one next to the device name will just disable it on that particular device.

How to View and Delete Your Google Maps History on Android and iPhone


You can also bulk delete your Location History if you’d like. There are two different ways of going about this: Delete All Location History or Delete Location History Range. These are the last two options in the Timeline Settings page.

To delete all Location History, tap that option. A warning will show up, telling you that this can’t be undone and it could affect apps that rely on your location history. If you’re cool with that, tick the “I understand and want to delete” box and tap “Delete.”

How to View and Delete Your Google Maps History on Android and iPhone

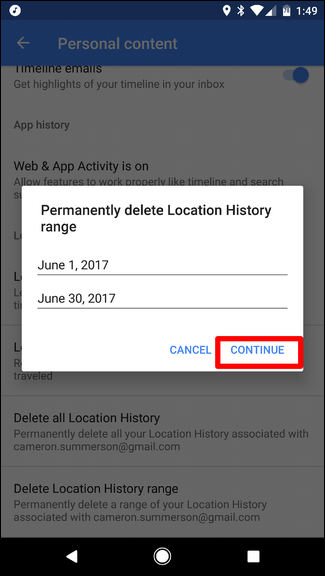
If you’re just looking to delete a range, tap the last option in this menu, then enter your start and end dates, followed by “Continue.”

How to View and Delete Your Google Maps History on Android and iPhone


The same warning from above will appear—tick the box and tap “Delete.” Poof! It’s all gone, never to be seen again.

How to Delete Maps’ Navigation History

Removing your navigation history is a bit more difficult, because there’s no way to delete it all in one fell swoop—you can only delete individual entries.

First, fire up Google Maps. From there, slide open the menu by either swiping from left to right or tapping the three lines in the upper left corner. Scroll down until you see “Settings.” Tap it.

About halfway down this menu is an option for Maps History. That’s the one you’re looking for.

How to View and Delete Your Google Maps History on Android and iPhone


Once here, you’ll see a lit of everywhere you’ve navigated to. There’s no way to completely clear this data, so you’ll have to delete each one individually by tapping the little X on the right side.


How to View and Delete Your Google Maps History on Android and iPhone

After tapping the X, you’ll get a little warning telling you that this entry will be removed and deleted from Maps history. If you’re good with that, just tap “Delete.” Done and done.

Friday, 21 July 2017

Subscribe to Earthquake Alerts for your Area

The U.S. Geological Survey agency monitors earthquake activity around the world. It reports the geographic location and intensity of an earthquake and anyone can subscribe to this data through Twitter, RSS feeds and KML files for Google Earth.

Then there are desktop software like Quake Alert that poll the USGS website and will pop-up an alert as soon as a new “big” earthquake is reported anywhere in the world.

Get Earthquake Alerts for your Surrounding Areas

The Twitter and RSS feeds will report earthquake activity worldwide but if you are only interested in receiving email alerts for your own geographic region, you should use the Earthquake Notification Service.

Here you have a Google Map and all you have to do is draw a custom polygon over regions that you would like to monitor for earthquake activity. You can mark one or more regions on the map, set the notification magnitude threshold (like only send me alerts for earthquakes with magnitude of 5 and above) and save your profile.


The USGS website says that information for U.S. earthquakes is generally available within 2-8 minutes but for earthquakes outside the U.S., it may take up to 20 minutes to report the activity. Twitter may thus be a faster medium to get earthquake news but as USGS says – “it cannot provide quantitative data such as location and magnitude.”

Wednesday, 19 July 2017

Find Street Names on Google Maps That Have Your Name

If your first name is Elizabeth, you’ll find the following Google Map interesting as it highlights all the street names and roads in North America that share your first name.


And here’s a similar Google Map highlighting streets that have the word “Michael” in their names.


CREATE A GOOGLE STREET MAP WITH YOUR NAME

If you would like to know which streets and roads in America have the same name as you, check this public database of name of boys and girls at Weather Salad.

Alternatively, you may use the following direct URLs – just replace YOUR_NAME with your first name:

For streets with boy names (e.g., Jacob, Wilson, Alexander or Harrison)

http://maps.google.com/?q=http://media.weathersealed.com/data/streets/boys/YOUR_NAME.kmz

For streets with girl names (e.g., Ashley, Sharon, Vanessa or Catherine)

http://maps.google.com/?q=http://media.weathersealed.com/data/streets/girls/YOUR_NAME.kmz
You can currently find details of around 2000 most common first names of boys and girls according to the social security database.

Find How Far You Can Go from a Location in the Given Time


Consider this. You have reached the cinema hall a little early and the movie will start in about 45 minutes from now. Since there’s nothing else to do, you decide to explore the nearby area on foot but how far can you can in that time duration?

Enter Cartoo, this is a simple Google Maps based mashup that may give you a rough idea on how far should you travel in a certain amount of time. Put your current position (starting address), the mode of transport you are taking – car, bicycle or will you be walking – and the time you have at your disposal.

It then draws an area on the Google Map that you can possibly cover in the given time.

The developer hasn’t specified how the region is calculated but I assume they take an average speed of your mode of transport and mark the farthest point in the map that can be reached at that speed in the given time. 

Sunday, 16 July 2017

Find Opening Hours of Tourist Places with Google

Let’s say you are in New York on a family vacation and plan to visit all the famous tourist attractions of the city including the Empire State Building, American Museum of Natural History, Statue of Liberty and the Central Zoo.

In order to plan your visit better, you need to know the exact operating hours and the days of the week when those buildings and parks are open (and/or closed) for public.


FIND THE OPERATING HOURS WITH GOOGLE

You can do this in two ways – you can either visit the official website of that place and search for “Opening Times” inside that site or you can save yourself a click and use Google directly.

The trick is simple. Type the name of the place that you are planning to visit and add the word “hours” to your search query. When you do this, Google will automatically show you the visiting hours of that place in the sidebar of search results.

For instance, the search query – american museum of natural history hours – will instantly give you the visitor hours of the place. You may use this query for monuments,  museums, animal zoos, public libraries and other places of tourist interest though it doesn’t work with theatres.

Saturday, 15 July 2017

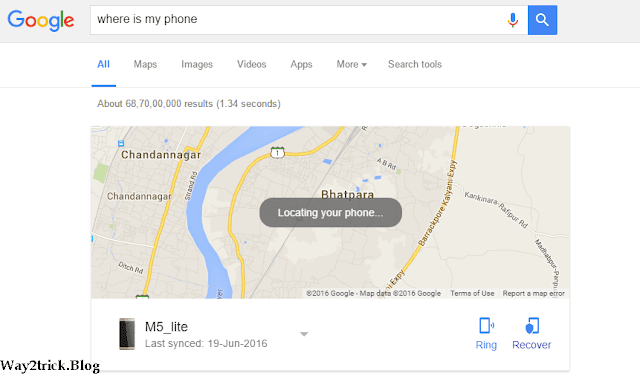
How to Locate Your Android Phone/Tablet Using Google

Good Evening Friends., This way2trick  will tell you how to:

1. Configure your Android Device for locating.
2. Locate your Android Device on Google maps.
3. Lock your Android Device.
4. Reset the PIN on your Android Device.

Steps:-

How to Locate Your Android Phone/Tablet Using Google


1. Configure your Android Device:
2. Go to the android market and install the Google Apps Device Policy Application.
3. Go to Settings> Accounts> and Add a new account (This will be your Google Apps Account).
4. While adding the Google Apps account you may or may not be redirected to the Google Apps Device Policy App.
5. Once you finish adding the Google Apps Account in the Accounts Section, go to the Google Apps Device Policy App and configure the app to link with the newly added account.

Viewing the device on the Internet:-


1. Log in to your Google Apps Account on the web.


2. Once logged in, copy this URL (https://www.google.com/apps/mydevices/b/0) into another tab in the browser you are currently using.

3. You will be redirected to a page with your device and Information pertaining to it.

Use the Service:


1. You will be given options to -
  • Manage (Reset PIN, Ring Device, Lock Device etc.)
  • Locate using Google maps
  • View your device information -
  • Model: XXXX
  • Hardware Id: 012XXXX043XXXX5
  • Android Version: 2.X.X
  • Last Sync: 14 Dec, 20XX 05:X2 AM
  • Registered: 13 Dec, 20XX 03:X2 PM
  • Status: Active


Tips-

  • Multiple devices can be located using the My Devices feature in Google for Business and Education customers.
  • Make sure the Google Apps Device Policy application is installed on your phone via the android market (The corporate email sync will not function without this).


Warnings-

  • Your company's system administrator can see your device information when the device is linked to the Google Apps Account.


Things You'll Need-

* A Google Apps Account (more information in sources below).
* Google Apps Device Policy App installed on your Android Device
* Your Google Apps Account to be linked with the Google Apps Device Policy App.


Sunday, 25 June 2017

How to Create your own Google Maps

Would you like to create a custom Google Map of all the wonderful cities that you have visited so far. Or maybe an annotated map that offers easy driving directions to the wedding venue? Or maybe you have customers in different parts of the world and you would like to display testimonials on one Google Map.

These are just some of the many scenarios where you may want to build your own maps. Let’s now look at some of the best online tools that make it easy for us to create custom maps in the browser without requiring any programming knowledge.

HOW TO MAKE CUSTOM GOOGLE MAPS

One of the easiest way to create custom maps is through the Google Maps website itself. Open maps.google.com and click Create Map under My Places. Next search for a place, or drop a placemark manually, and save it to your custom map. Repeat until you have added all the places to the Google Map.

You can later change the style of individual pins, add rich-text descriptions, photos and videos to a location – these will show up when someone clicks the location pin.

The same “My Places” option in Google Maps can be used for creating a directions map. In that case, choose the “Draw a Line” tool and move it along the desired route. Double-click to finish the drawing. Here’s a nice video tutorial that will guide you through the process of creating custom maps with Google Maps.


CREATE MORE ACCURATE ROUTE MAPS

If you have a smartphone, you may also use GPS recording apps like My Tracks (Android) that log your location at different times and then create a complete route from these different points. Drive to the starting point and hit the record track button on your phone. Once you have reached the destination, stop recording and the app will export the route as a Google Map.

The other option for drawing direction maps is QuikMaps. It basically converts Google Maps into a whiteboard and you can scribble routes on the map just like you draw freehand on any canvas. Once you have sketched the route, export it as a KML file which can be imported into Google Maps or Google Earth for easy publishing.

CREATE GOOGLE MAPS FROM EXCEL SHEETS

One slight disadvantage with the Google Maps tool is that they do not let you enter places in bulk. Yes, there are options to import KML and geoRSS files but how do you create these files in the first place?

Enter BatchGeo – an online tool that can import location data from a spreadsheet table and marks those address on a Google Map. You can copy-paste postal addresses or the latitude and longitude coordinates and BatchGeo will map them all after decoding. It’s useful tool but you cannot export the map with the free account.

ADD ANIMATION TO YOUR GOOGLE MAPS

You may see flight tracking maps where multiple airplane images seem to move along different paths on a single Google map. If you would like to have something similar for your own Google Map, check out Animaps.

With Animaps, you can quickly create animated markers that move along a pre-defined route over the map. You can have multiple markers on the same map and their respective playback speed can be controlled as well.

Sunday, 18 June 2017

Create a Time-Lapse Movie with Google Street View

To get started, you would obviously need hundreds of Street View images. It is not practical to capture these many screenshots manually so what I have done is written a small script that does two things – it capture the screen and then advances the Street View in the browser by one step. And this runs in a loop.

Step 1. Create a new profile in SnagIt that captures the screen and auto-saves the screenshot to a file in the background. Make sure that you capture screenshot images at 1280×720 for publishing a 720p video.

Step 2. Assuming that you have AutoHotkey on your computer, create a new text file and copy-paste the following lines into that file. Save the file with .ahk extension.

Loop <br />{
<br />&#160; Send {Up down} ; Press the UP arrow key to advance  
<br />&#160; Sleep 1 
<br />&#160; Send {Up up}
<br />&#160; Sleep, 1000 ; Wait for the Street View images to load in the browser
<br />&#160; Send, {PRINTSCREEN} ; Capture the screen and save the image to a file
<br />}
Step 3. Open Google Maps Street View in the browser and run the .ahk file that you created in the previous step. Once you have captured enough images, end the script by right-clicking the Autohotkey icon in the taskbar.

Step 4. Open Windows Live Movie Maker (or iMovie if you are on a Mac) and import all these images into a new project. After the import is complete, select all the images and under the Video Tools – > Edit, set the image duration to 0.2 seconds.

That’s it. Go to File – > Save Movie to create your first time-lapse video of Street View and upload it to YouTube in HD (720p).


Saturday, 17 June 2017

Find the Exact Date When a Google Maps Image was Taken

Curious to know the exact date when Google cameras captured those aerial and street view photographs of your home (or any other address)? Well you can find that data easily in Google Maps and Google Earth.

FINDING THE CAPTURE DATE OF SATELLITE IMAGES

If you wish to know the date when satellites captured those aerial images that you now see in Google Maps, you will have to use Google Earth for that (for some reason, these dates aren’t displayed on the Google Maps website).


Launch the Google Earth program, search for any location and zoom in as much as possible. You should see the capture date of that image in the status bar as highlighted in the above screenshot.

FINDING THE CAPTURE DATE OF STREET VIEW IMAGES

If you happen to live in a country where Google Street View is available, you can use the Google Maps website itself to determine the date when Google Street Views cars were in your area shooting pictures of the neighborhood.

Search for an address in Google Maps and switch to the street view by dragging that street view icon to the map. The image date will be displayed in the status bar again though in this case, Google only reveals the month and year of the picture but not the exact date.


To summarize, you need to use Google Earth to determine the capture date of Aerial Images and Google Maps for finding the date of Street View images.

Friday, 26 May 2017

New features of Google Maps that makes travelling easy

Apple has completely revamped their operating system iOS, by launching iOS 7. iOS 7 has a completely new look with a lot of advanced features. Google brought Google Maps back to iOS in December last year and till date Google is keep on bringing new features to the Google Maps app to make it much more useful. Some major features were added in the Google Maps app which were live traffic updates, transit update which crossed 10 million downloads of the app.

New features of Google Maps that makes travelling easy

Now Google is bringing smaller yet significant changes which will definitely make it easier for you to travel using Google Maps. Today in this post we are going to tell you the 4 New features of Google Maps.

New features of Google Maps

 1.Directions for multiple locations :

This is the one most required feature which one should provide in a navigation app. Previously Google has included this feature but it was stripped out later. In the recent update it was seen that this feature was brought back in the app and is not only available while driving but you can also get directions for multiple locations while biking and walking.

2.Multiple Directions for Attractions present in the City:

This feature is actually a part of the above feature. Using this feature people who have visited attractive locations in the city and founded them attractive can mark them up. You can also maintain the order of pinning using the drag and drop feature so that a route can be maintained and all the places can be visited without wasting of time. Using Google Maps you can also have the street view which will help you in better understanding the location and what you can also have a preview of your destination from your mobile phone only.

3.Finding Pre-booked flight tickets, hotel reservations:

We founded this feature as one of the best feature which was brought in Google Maps. Borrowed from Google search, this is one great addition to the Google Maps app. If you have previously used Google maps and you know the airport code or name of the places you where you have dined, you can enter those keywords and Google Maps will help you to get the directions of those locations. In a way Google is helping in refreshing up your memories. However you need to be logged in your Google Maps account for accessing this feature. If you are residing outside US you have to wait to use this feature as this feature is currently available for US and is only available in English.

4.Look for upcoming events :

Now you can see which events are going to take place by selecting the venues. Let’s say you want to find out which events are going to take place in the O2 Arena in the upcoming week. Just search for O2 Arena and then tap on Upcoming events. You will see a list of scheduled events that are going to take place in O2 arena in the upcoming days.

Thanks for reading.

How to Claim or add Google Business Listing With Google Map

Hello Friends.. Today we talk about Claiming your personal business listings in Google business map is a critical step in capturing those searches within your local area. Approximately 20% of all searches have local intent and that number can be as high as 53% on a mobile phone. By claiming your own listings, you control your branding message, ensuring all of the information related to your business is current and correct and preventing anyone else from falsely claiming your listing.

Okey.. Now i am going to present all steps of How to Claim or add Google Business Listing With Google Map.

Steps-

How to Claim or add Google Business Listing With Google Map


1.) Go to Google My Business at https://www.google.com/business/


How to Claim or add Google Business Listing With Google Map

2.) Click on "Get Started".


How to Claim or add Google Business Listing With Google Map

3.) Enter your business's phone number.


How to Claim or add Google Business Listing With Google Map

4.) Enter your business's information. Be as comprehensive as possible when filling in your business details on your listing; it will help your listing rank higher in the search engines.


How to Claim or add Google Business Listing With Google Map

5.) After reviewing your business's information, click "submit".


How to Claim or add Google Business Listing With Google Map

6.) Select method for verification.

If there are any mistake, please place a   comment in comment box. Thank you.

Wednesday, 24 May 2017

Find the Latitude and Longitude of any Place with Google Maps

How do you find out the exact latitude and longitude coordinates of a place when you either have the street address or the zip code or just the name of a city. Well, that’s easy with Google Maps.

Open the Postal Address Finder and search for an address. Use the zoom controls on the map to zoom-in as much as possible until you locate the place for which you need the latitude and longitude.

Now drag the red marker and place it any point inside Google Maps. The latitude and longitude value will appear in the info window.


Friday, 19 May 2017

How to Make Google Maps Embeds Responsive


HOW TO EMBED GOOGLE MAPS RESPONSIVELY

This is the default embed code for the new Google Maps:


<!-- Height=450px; Width=600px -->
<iframe src="https://www.google.com/maps/embed?pb=!1m14!1m12!1m3!1d7098.94326104394!2d78.0430654485247!3d27.172909818538997!2m3!1f0!2f0!3f0!3m2!1i1024!2i768!4f13.1!5e0!3m2!1sen!2s!4v1385710909804" width="600" height="450" frameborder="0" style="border:0"></iframe>

As specified in the height and width parameters of the embed code, the default height for medium embeds is 450px or 75% of the default width (600px).

If you wish to transform this static sized Google Map into one that is responsive, all you have to do is add a few CSS rules to your web page and wrap the embed IFRAME inside these rules.

The new embed code with responsive style will be something like this. You can change the value of padding-bottom (line #4) from 75% to something for a different aspect ratio.


style>
    .google-maps {
        position: relative;
        padding-bottom: 75%; // This is the aspect ratio
        height: 0;
        overflow: hidden;
    }
    .google-maps iframe {
        position: absolute;
        top: 0;
        left: 0;
        width: 100% !important;
        height: 100% !important;
    }
</style>

<div class="google-maps">
    <iframe src="https://www.google.com/maps/embed?pb=!1m14!1m12!1m3!1d7098.94326104394!2d78.0430654485247!3d27.172909818538997!2m3!1f0!2f0!3f0!3m2!1i1024!2i768!4f13.1!5e0!3m2!1sen!2s!4v1385710909804" width="600" height="450" frameborder="0" style="border:0"></iframe>
</div>
A similar technique can be used to embed Instagram videos and photos responsively.

Thursday, 11 May 2017

How to Fake your Location in Google Chrome

How Browsers Determine your Location

Earlier, websites would use the IP address to determine your approximate location but with the HTML5 Geolocation API, web browsers can more accurately detect your location using data from GPS, Wi-Fi networks, cell towers, Bluetooth and the computer’s IP address. If you agree to share your location with the browser, it will send these details to Google Location Services for estimating your location which is then shared with the requesting website.

To give you an example, open the Where am I app in your browser, allow it to use your location information and the app should be able to display your latitude and longitude coordinates (it is more accurate on mobile browsers as those devices have built-in GPS).


How to Fake your Geolocation Coordinates

When you happen to visit a location-aware website, the browser will always ask for a confirmation before sharing your location. If you aren’t keen to share your geographic coordinates, you can always deny that request or, if you are using Google Chrome, you can even send a fake location to the website.

Here’s how. While in Google Chrome, press Ctrl+Shift+I on Windows, or Cmd+Opt+I on Mac, to open the Chrome Developer Tools. Now press the Esc (escape) key to open the Console window. Switch to the Emulation tab and choose the Sensors option in the left sidebar.

Here check the setting that says “Emulate Geolocation coordinates” and specify the exact latitude and longitude coordinates* that you want to share with that website. You can use the Postal Address finder to know the latitude and location of a place.

Now refresh the current web page and it will take your fake location. Make sure that the developer tools panel is visible always else Chrome will not override your geolocation.

The option to fake your geolocation is not available in the DevTools of Mozilla Firefox but you can use the  Geolocator addon to send any preferred location to the HTML5 Location API.


Friday, 5 May 2017

How to Temporarily Share Your Location with Someone Using Google Maps

You’re meeting a friend downtown in a new city, and he asks you where you are. Be honest: you have no clue. Luckily, Google Maps can help you both out.

This relatively new feature shows your location right on your friend’s map—and his on yours—even if you’re both moving around. And if you’ve got Google Maps open, it’s easy to start sharing your location, assuming the person you want to share locations with is also a Google Maps user.

You know that blue dot that shows you where you are?


  • Tap that blue dot and you’ll see a bunch of options, including sharing your location.


  • You can choose how long to share your location—the default is one hour.


Once you decide how long to share your location, you can then choose specific contacts to share your location with using the “Select People” button. You can scroll through your contacts and choose someone to share with. The list will be populated with Google users in your contacts list. If the person you want to share your location with is not on the list, you can also send a link via SMS or any messaging app.

  • The person you share your location with will get a notification.


  • When they click through, they will see your location on their map.


The other user will also have the option to share their location with you, making it much easier for you to find each other.

Related Posts Plugin for WordPress, Blogger...

Labels

404 AdBlock Add-on Airtel GPRS Trick Airtel SMS Trick Alexa Amazon Amazon Kindle Amazon Prime Android Android 8 Android Oreo antivirus Apple Apple Mac ASCII Audacity Audio Authotkey Backup Balance Transfer in Vodafone Battery Bing Blogger Blogging Bookmarklet Browser Camera Chromebook clock Cloud colors command lines Computer Computer Tricks configuration Contact Creative Commons Credit Card CSS devolop DIY Doodle DOS Download Dropbox E-Mail eBook Email Email Attachment Embed Encryption English Error Evernote Eyes Facebook Facebook Tricks Feedburner Flipkart Font Foursquare Free Internet Free sms trick in Vodafone G Mail Gadget Game Getty Images GIF Gists Github Google Google AdSense Google Analytics Google Apps Google Chrome Google Contacts Google Currents Google DNS Google Docs Google Drive Google Earth Google Font Google Forms Google Images Google Map Google Photos Google Play Store Google Plus Google Print Google Reader Google Script Google Sheets Google Spreadsheet Google Translate GPRS Setting GPS Hacking Health App HelloFax Hindi Hoodie HTML Icons idea Image Editing Images IMEI Indian Railways Infographics Instagram Internet Internet Explorer Internet Tricks iOS iPad iPhone IRCTC iTunes iTV JavaScript JioCinema JioTV Junglee Kindle Language Translation Laptop Laptop. TV Life Time FREE GPRS Life-Style Link Linkedln Linux logo Make Money Online Microdoft Powerpoint Microdoft Word Microsoft Office Microsoft Outlook Mobile Mosaic Music Name Networking nexus Notepad OCR Online Shopping Open DNS OS Outlook Password PDF Petya Phillips Hue Lights Photogtraphy Pixel Play Station Podcasts Pokemon Pokemon Go Polls Print Productivity Proxy Server Pushbullet QR Code Ransomware Reddit Reliance Hack GPRS Reliance Jio RGB Ringtone Router RSS Safe Mode Samsung Galaxy S Scrabble Screen Capture Screen Sharing Screencast Secrets Security Send free sms from PC SEO Sierra Skype Slideshare SMBv1 SMS Snapchat Snapdeal Social Media Solution Sound Device Speech Recognition Sql Steam Sync Synology NAS Tata Docomo GPRS trick Teleprompter Torrent Trick Tricks TV Twitter UltraISO Unicode Unknown Extension Unlimited 2GB Unlimited 3GB Unlimited GPRS USB USB Security Key Video Editing virtual desktop Virus attack VLC Vodafone 110% working trick for GPRS Vodafone 3g Vodafone GPRS VPN wallpapers WannaCry Web Design Web Domain Website Wget Whatsapp WiFi Wikipedia Windows Windows 10 Windows 10 S Windows KN Windows Tricks windows updates Winows N Wolfarm Alpha WordPress XBox YouTube Zip
Twitter Delicious Facebook Digg Stumbleupon Favorites More