Showing posts with label Networking. Show all posts

Monday, 27 November 2017

How to make your Windows 10 PC discoverable on the network

In this article i will tell you how to change your network location from public to private and make it discoverable on the network . Normally when you connect to the Wifi Network or Ethernet connection for the first time on your PC, its asks you to choose from the two options namely Public & Private. But, once it remembers the network, it never asks you again.

Public network means that the Network discovery and sharing is turned off, while in Private network mode the Network discovery of your PC and sharing on other devices on the same network are turned on. The names are bit confusing as here Public network means No discovery and Private means discoverable on the same network.

How To Make Your Windows 10 PC Discoverable On The Network


(1). Open Settings by clicking on the Windows icon on the taskbar and then clicking on Gear icon.


(2). Now, Click on Network & Internet.


(3). Now, Click on WiFi from left menu.

(4). Finally click on your WiFi network name on which you are connected.

Note: – If its Ethernet connection click on your Ethernet icon.


(5). Now, Choose Private as your network  profile.


That is it. This will make your content discoverable on the network on your windows PC.

Thanks for landing on this post, If you like my post then give your opinion and feedback in comment box.


TAGS:- #How to make your Windows 10 PC discoverable on the network, #make your Windows 10 PC discoverable on the network, #How to Enable Network Discovery and Configure Sharing Options in Windows 10, #How to configure network discovery on Windows 10, #Turn on or off Network Discovery in Windows 10, #How to Allow Your PC to be discoverable by other, #How to change your network location from Public to Private, #Enable or Disable Network Discovery in Windows 10/8/7, #Turn On or Off Network Discovery in Windows 10 Network & Sharing, #Windows / PC not discoverable on network, #do you want to allow your pc to be discoverable by other pcs and devices on this network, #windows 10 network discovery not showing all computers

Tuesday, 18 July 2017

How to Advertise Your Freewebs Site Free

With "Over 20 million websites and counting" at Freewebs, it's hard to make your stand out. So, why not advertise? Here are some free and safe ways to advertise your site.

How to Advertise Your Freewebs Site Free

Steps:-

1. What better way to spread the word about anything other than to tell people about it for real! 
If you have other people who use freewebs, then you can probably convince them to advertise your site if you advertise theirs.

2. On almost any account to a pet site I know of, there is no rule against talking about YOUR site. 
Just post it in the forums or chat a few times (But do not do it so many times you're spamming).

3. You could, if you have a talent for drawing, make pictures for your site. 
Include codes so people can use them as free advertisement for you. People WILL do it, if they like it. You can also make banners, avatars, and GlitterText.


Most marketing experts recommend that businesses spend anywhere from 2 to 5 percent of their gross sales on advertising. But if you're still growing your business, you might not have the budget for large ad campaigns, or you might be focusing your capital on other areas. You too can take advantage of free ways to reach potential customers and advertise your business.

Marketing Online:- 

Method 1.) Start a web presence- Harness the power of the Internet to draw attention to your business. The web is full of free outlets that can potentially reach hundreds of thousands of consumers .

    You can Make a Free Website to provide information about your business and market your products and services.
    A business email address is important. You can Make an Email Address for Free. On every email you send out for your business, have a small 3-4 line signature at the bottom (add this in Settings). Include links to your business' website, Facebook page, Twitter account or whatever other online presence you have.

Method 2.) Use Twitter- Setting up a Twitter account is free, and it allows you to interact with customers on an immediate and personal level. See Twitter for Business for more information.


    Choose a handle or username that's as close to your business' name as possible and tether your business email to the account.
    Use your logo as your avatar. Seeing your business logo with every tweet you publish can help strengthen your brand.
    Follow current customers, family members, friends and other businesses you admire or whose products your business uses.
    Promote your business in your tweets, but keep it fun, too - host giveaways or give shout outs to loyal customers. Give people a reason to follow your business.


Method 3.) Create a Facebook page. Setting up a business page on Facebook is free, and allows you to interact with your customers and other businesses. See Facebook for Business for more information.

    Host giveaways limited to people who "like" your profile or share one of your posts, and offer special Facebook-only deals via messages to customers who follow your activity.
    Many businesses forgo creating their own website and simply list their Facebook pages as their business sites. Consider if this might be the right course of action for your business.

Method 4.) Get on Yelp. Yelp is a website where consumers can review and recommend businesses. Learn more at Yelp for Business Owners.

    You can use your Yelp page to post information and special offers, as well as to gauge how well you're serving your customers.
    Some business owners respond to bad reviews on Yelp by contacting the Yelp user directly or posting a reply offering to remedy the situation. This allows you to let potential customers know you take their concerns seriously.

Method 5.) Build your Google Places listing. List your business on Google Places so that it will pop up on Google Maps searches, and so people can share reviews and rate your business. Make sure you have a Gmail account specific to your business. Yahoo! Local hosts a similar service.


Method 6.) Create an account with a free online directory. Most online directories allow you to upload unlimited products, businesses and services with a detailed information about such product and also automatically provides a contact form for individual product where prospective customers can contact product owner one-on-one.


    Create your listings. Listings are the products, business or services you or your company offers. A good online directory allows you to upload as many as possible listings so as to boost your target market reach.
    Your products will be stored in the database and will be displayed on their front page. All products uploaded are also search engine optimized after 24 hours.

Method 7.) Join appropriate online communities. Many industries, especially those with special niches, have online communities where people discuss and share information. Joining and contributing to these online communities can be a valuable marketing tool.

    It is important to be active in these online communities to build rapport with other members. If you only participate only intermittently, you may lose more customers than you gain.
    You also should not just blatantly advertise for your business in these communities. Make sure your contributions are valuable to the other members, but always put your business name, logo, and links to other web presences in your signature.

Tips:-

  • It might take time for your site's advertisement to grow if you use the "word of mouth" method, but don't get too worried about it. It is the most standard type of advertisement.
  • You can only use the "pictures" method if people know about your site. So, use the other two methods first.
  • Remember, some websites DO have rules about advertising your site, if it's in the terms of service, don't advertise your site.


Warnings:-

  • Remember to use an appropriate name for your website. All people of any age could visit it including kids!
  • Never give out any personal information, like your phone number, address, or real name on the computer.

Monday, 26 June 2017

Build a Wireless Home Network without a Router

Let’s say you have one internet connection at home that you want to share across all your desktop and laptop computers, your Wi-Fi enabled mobile phones, tablets, video game consoles (like the Xbox), digital photo frames and any other wireless devices that you may have at home.

How do you do this?

The easiest way to setup a wireless network, as we all know, is with the help of a router – just attach a wireless router to your modem and any Wi-Fi enabled gear, that’s located inside the signal range of your router, will be able to connect to the web using that lone Internet connection.

SETUP WIRELESS NETWORK WITHOUT A WIRELESS ROUTER

Now consider a slightly different scenario – you have all these Wi-Fi enabled devices at home but there’s no router. Well, there’s no reason to buy one because you can still easily setup a wireless network as long as your computers have a wireless network adapter*.


[*] Most new desktops and laptop computers are already equipped with internal network adapters so you are ready to go without a router.

If your computer doesn’t have built-in wireless capabilities, you can either buy a USB network adapter that plugs into the USB port of your desktop or go for a wireless adapter that directly plugs into your notebook’s PC Card slot. Desktop users can also opt for an internal wireless PCI card but you’ll have to open the computer case in order to install this network adapter.

CREATE A WI-FI NETWORK WITHOUT A ROUTER

Now that you have everything in place to create a Wi-Fi network, let’s actually build one.

For Windows XP and Vista users

If your main computer, that is already connected to the internet, is running Windows XP, Vista or even Mac OS X, you can set up an ad-hoc Wi-Fi network and the other wireless devices can then connect to the web via this ad-hoc network (also called a computer-to-computer network).

Wired Connection In, Wireless Connection Out

It’s an easy process. To set up an ad-hoc network in Windows Vista, go to Network and Sharing Center from the control panel, select “Set up a connection or network” and choose “Set up a wireless ad hoc (computer-to-computer) network”.

Make sure you select “Save this network” option else the ad hoc network will be removed if no other computers / devices are connecting to the network.


Turn on Internet Sharing in the next screen and now your other home computers can connect to the ad hoc network just like they would connect to any regular wireless network. Setting up an ad hoc network in XP takes a couple of extra steps but also make sure the host computer is running at least XP SP2 or SP3.

For Windows 7 users

If you are on Windows 7, you can instantly turn your  computer into a personal Wi-Fi hotspot without having to configure anything. All you need is a free software called Virtual Router and the computer connected to the internet must be running Windows 7.

[*] Virtual Router works will all editions of Windows 7 except the Starter edition because Microsoft has disabled the Virtual Wifi feature in that particular edition.

Using the virtual router is simple – just run the program on any Windows 7 computer, assign a password and that’s it. In the above example, I used the Virtual Router to connect an iPod, an Ubuntu Linux laptop and a Windows desktop to the Internet via a Windows 7 notebook where that virtual router software was running.

As new devices join the Wireless network, their assigned IP and MAC addresses instantly appear in the Virtual Router window. And you can click the “Stop Router” button anytime to deactivate the hotspot and disable Internet sharing.

VIRTUAL WI-FI VS AD HOC WIRELESS NETWORKING

To set up Ad Hoc networking, your main computer needs to have an Ethernet based Internet connection as well as a Wireless (WLAN) network adapter. In the case of Virtual Wi-Fi, the Ethernet card is optional so you can turn a laptop into a hotspot even if your laptop itself is connected to a Wireless network and not to an Ethernet cable.

Computers and other wireless devices in ad hoc networks must be within 30 feet of each other but there’s no such restriction in the case of Virtual Wireless networks.

Ad-Hoc wireless networking is available on Windows XP, Vista and Windows 7 while Virtual WiFi, which is much easier to setup, is available on Windows 7 or Windows Server 2008.

[*] Intel’s Centrino 2 processors include a technology called My Wifi that can also turn your wirelessly connected laptop into a personal Wi-Fi hotspot but the interesting part is that this supports Windows Vista as well in addition to Windows 7.

Saturday, 3 June 2017

How to Test Internet Speed

Two Methods: Take a Speed Test  Understand the Terminology

Not sure if you're getting what you paid for with your internet service provider? Follow these easy steps to test your connection speed.

Method 1 of 2: Take a Speed Test :-

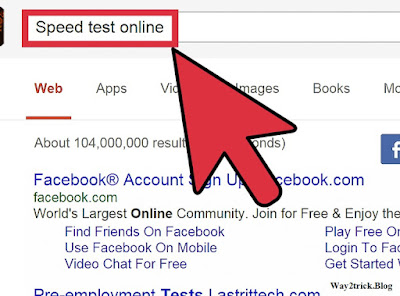
1. Find a speed test online.  There are a variety of speed tests available for free online. These tests usually perform three functions: ping test, download speed test, and upload speed test.

1.> Find a speed test online.

There are a variety of speed tests available for free online. These tests usually perform three functions: ping test, download speed test, and upload speed test.


How to Test Internet Speed

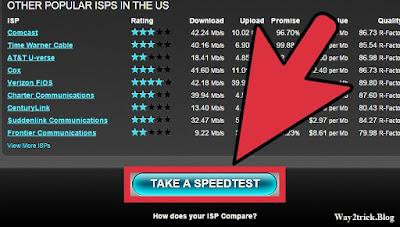
2.> Select the closest server.

Speed tests usually give a list of servers nearby to connect to and perform the test. Most tests automatically select the most optimal server for your location.
  • A close location will give you the best results and the closest transfer rate to your maximum
  • You can test your speeds to servers around the world to see how long it would take you to download files from another country.
How to Test Internet Speed


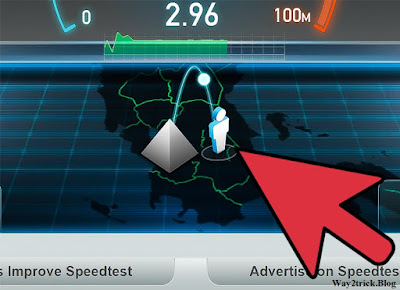
3.> Run the test.

Wait a few moments as the test file is sent to your computer. The results will be displayed in Mbps. Compare your actual speed to the advertised speed of your service provider.


How to Test Internet Speed

Method 2 of 2: Understand the Terminology :-

1.> Learn the way connection speeds are measured.

Connection speeds are measured in Mbps. This stands for Megabits Per Second. Mbps is the standard method of calculating transfer speeds. The most important thing to note is that a megabit (Mb) is different than a megabyte (MB).
  • File sizes are typically measured in MBs.
  • A megabit is 1000000 bits, which translates to about 125 kilobytes. A megabyte is made of 1024 kilobytes.
  • This means that a 10 Mbps connection will deliver download speeds up to 1.25 MBps.
How to Test Internet Speed


2.> Understand the basics of connecting to a server.

Connections are made to servers. A server is the location where you are retrieving data from. Servers are physical objects, and their relative distance to your computer will affect the speed at which you connect to them.
  • All things being equal, you will download a file faster from a server that is 10 miles (16 km) away as opposed to a server that is 500 miles (800 km) away.
How to Test Internet Speed


3.> Know the difference between uploading versus downloading.

When you download something, you are retrieving a file from a server. When you upload, you are sending a file to a server. Internet connections are typically significantly faster downloading than uploading.

How to Test Internet Speed

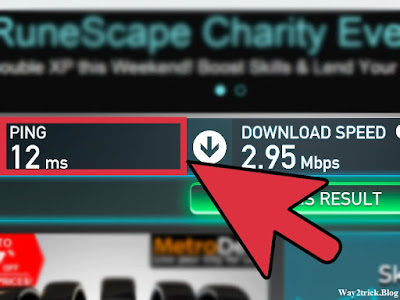
4.> Understand ping.

Ping measures time to connect. The ping is a measurement of how long a message takes to reach one end of the connection to the other. This affects how long a download may take to get started, but does not affect overall transfer rate.

How to Test Internet Speed

Tips :-

  • Both cable and DSL connections are affected by the number of users currently accessing the internet in your area. The differences are often negligible, but they can be noticeable when traffic is heavy.
  • Phone line quality and length has a large impact on DSL connection speed.

Tuesday, 30 May 2017

How to Link Your Website to Your Twitter

People all over the world use Twitter and many other social media websites as a way to advertise their businesses and products. If this is something you do, one of the important things you must do is to connect your website to your Twitter so people who are interested in your product or service can get quick and easy access to your website. You will need a desktop or laptop computer in order to connect your website.

Steps

How to Link Your Website to Your Twitter

1.) Log in to your Twitter account.
  • Keep a note of your username and password so that you will never have to worry about being locked out of your account.
How to Link Your Website to Your Twitter

2.) Click on the small gear symbol on the top-right portion of your screen.
This will be between the “Direct messages” and “Compose a new tweet” options. After you click on the gear, the site will take you to the Settings page.
  • Check on the left side, you will see a clickable list of options.

How to Link Your Website to Your Twitter


3.) Choose the option that says Profile.
After you click Profile, you will see a list of modifiable objects.

How to Link Your Website to Your Twitter
4.) Look for the Website box.
This should be between the “Bio” and Location” boxes on the right side.

How to Link Your Website to Your Twitter
5.) Enter in the Website box the direct link to your website you wish for people to see.

How to Link Your Website to Your Twitter
6.) Scroll toward the bottom and click “Save changes.
” It is CRUCIAL that you click on this box because this confirms that your website will show up on your profile.

How to Link Your Website to Your Twitter
7.) Go back to your profile page and see if your website is listed.  If it is, for sure others can see it as well.

Tips

  • You do not even need to post a business page; you can post your blogs and private information if you want to post it for entertainment purposes.
  • You can only post one website at a time. So if you have more than one page you want people to see, make a website and list all of your websites on that page so your followers can get to all of your pages.


Wednesday, 24 May 2017

Find the Subnet Mask of your Comptuer

All computers and mobile devices in the network have an IP address and the subnet defines which network are give IP address belongs to. The subnet Masks indicate which portion of an IP address denotes the network and which portion denotes the host. The subnet mask for class C IP addresses is 255.255.255.0 and is the default subnet mask for many computers and network routers.

FIND SUBNET MASK ON WINDOWS COMPUTER

To find the subnet mask of your Windows computer, go to the Run box (Windows Key + R) and cmd to open the Command Prompt. Here you can type the command “ipconfig /all” and hit the Enter key.

The Subnet Mask will be listed as one of the parameters in the output under “Ethernet Adapters – Local Area Connection.” Alternatively, you open Control Panel – Network & Internet -> Network and Sharing Center -> Local Area Connection and click the Details button. Here you’ll see the IPv4 Subnet Mask along with other details like the default gateway and DNS servers.

FIND SUBNET MASK ON YOUR MAC

The process for finding the Subnet Mask is slightly less complicated on a Mac. Click the Apple icon and open System Preferences -> Network.

From the Location drop-down list, select Automatic and select your Ethernet connection or Airport if you are connect to the Wi-Fi. Click the Advanced button, configure IPv4 using DHCP and you should see the Subnet Mask value on the screen.


Wednesday, 17 May 2017

How to Secure Your Wireless (Wi-Fi) Home Network


Wireless Networking (Wi-Fi) has made it so easy for anyone to use Internet on your computer, mobile phones, tablets and other wireless devices anywhere in the house without the clutter of cables.

With traditional wired networks, it is extremely difficult for someone to steal your bandwidth but the big problem with wireless signals is that others can access the Internet using your broadband connection even while they are in a neighboring building or sitting in a car that’s parked outside your apartment.

This practice, also known as piggybacking, is bad for three reasons:

* It will increase your monthly Internet bill especially when you have to pay per byte of data transfer.

* It will decrease your Internet access speed since you are now sharing the same internet connection with other users.

* It can create a security hazard* as others may hack your computers and access your personal files through your own wireless network.

[*] What do the bad guys use – There have been quite a few instances where innocent Internet users have been arrested for sending hate emails when in reality, their email accounts where hacked though the unsecured Wi-Fi networks that they had at home. Wireshark is a free packet sniffing tool for Linux, Mac and Windows that can scan traffic flowing though a wireless network including cookies, forms and other HTTP requests.


HOW TO SECURE YOUR WIRELESS NETWORK

The good news is that it is not very hard to make your wireless network secure, which will both prevent others from stealing your internet and will also prevent hackers from taking control of your computers through your own wireless network.

Here a few simple things that you should to secure your wireless network:


STEP 1. OPEN YOUR ROUTER SETTINGS PAGE

First, you need to know how to access your wireless router’s settings. Usually you can do this by typing in “192.168.1.1” into your web browser, and then enter the correct user name and password for the router. This is different for each router, so first check your router’s user manual.

You can also use Google to find the manuals for most routers online in case you lost the printed manual that came with your router purchase. For your reference, here are direct links to the manufacturer’s site of some popular router brands – Linksys, Cisco, Netgear, Apple AirPort, SMC, D-Link, Buffalo, TP-LINK, 3Com, Belkin.


STEP 2. CREATE A UNIQUE PASSWORD ON YOUR ROUTER

Once you have logged into your router, the first thing you should do to secure your network is to change the default password* of the router to something more secure.

This will prevent others from accessing the router and you can easily maintain the security settings that you want. You can change the password from the Administration settings on your router’s settings page. The default values are generally admin / password.

[*] What do the bad guys use – This is a public database of default usernames and passwords of wireless routers, modems, switches and other networking equipment. For instance, anyone can easily make out from the database that the factory-default settings for Linksys equipment can be accessed by using admin for both username and password fields.


STEP 3. CHANGE YOUR NETWORK’S SSID NAME

The SSID (or Wireless Network Name) of your Wireless Router is usually pre-defined as “default” or is set as the brand name of the router (e.g., linksys). Although this will not make your network inherently* more secure, changing the SSID name of your network is a good idea as it will make it more obvious for others to know which network they are connecting to.

This setting is usually under the basic wireless settings in your router’s settings page. Once this is set, you will always be sure that you are connecting to the correct Wireless network even if there are multiple wireless networks in your area. Don’t use your name, home address or other personal information in the SSID name.

[*] What do the bad guys use – Wi-Fi scanning tools like inSSIDer (Windows) and Kismet (Mac, Linux) are free and they will allow anyone to find all the available Wireless Networks in an area even if the routers are not broadcasting their SSID name.


STEP 4. ENABLE NETWORK ENCRYPTION

In order to prevent other computers in the area from using your internet connection, you need to encrypt your wireless signals.

There are several encryption methods for wireless settings, including WEP, WPA (WPA-Personal), and WPA2 (Wi-Fi Protected Access version 2). WEP is basic encryption and therefore least secure (i.e., it can be easily cracked*, but is compatible with a wide range of devices including older hardware, whereas WPA2 is the most secure but is only compatible with hardware manufactured since 2006.

To enable encryption on your Wireless network, open the wireless security settings on your router’s configuration page. This will usually let you select which security method you wish to choose; if you have older devices, choose WEP, otherwise go with WPA2. Enter a passphrase to access the network; make sure to set this to something that would be difficult for others to guess, and consider using a combination of letters, numbers, and special characters in the passphrase.

[*] What do the bad guys use AirCrack and coWPAtty are some free tools that allow even non-hackers to crack the WEP / WPA (PSK) keys using dictionary or brute force techniques. AirCrack may be easily used to break WiFi encryption using a jail-broken iPhone or an iPod Touch.


STEP 5. FILTER MAC ADDRESSES

Whether you have a laptop or a Wi-Fi enabled mobile phone, all your wireless devices have a unique MAC address (this has nothing to do with an Apple Mac) just like every computer connected to the Internet has a unique IP address. For an added layer of protection, you can add the MAC addresses of all your devices to your wireless router’s settings so that only the specified devices can connect to your Wi-Fi network.

MAC addresses are hard-coded into your networking equipment, so one address will only let that one device on the network. It is, unfortunately, possible to spoof a MAC address*, but an attacker must first know one of the MAC addresses of the computers that are connected to your Wireless network before he can attempt spoofing.

To enable MAC address filtering, first make a list of all your hardware devices that you want to connect to your wireless network**. Find their MAC addresses, and then add them to the MAC address filtering in your router’s administrative settings. You can find the MAC address for your computers by opening Command Prompt and typing in “ipconfig /all”, which will show your MAC address beside the name “Physical Address”. You can find the MAC addresses of Wireless mobile phones and other portable devices under their network settings, though this will vary for each device.


[*] What do the bad guys use – Someone can change the MAC address of his or her own computer and can easily connect to your network since your network allows connection from devices that have that particular MAC address. Anyone can determine the MAC address of your device wireless using a sniffing tool like Nmap and he can then change the MAC address of his own computer using another free tool like MAC Shift.


STEP 6. REDUCE THE RANGE OF THE WIRELESS SIGNAL

If your wireless router has a high range but you are staying in a small studio apartment, you can consider decreasing the signal range by either changing the mode of your router to 802.11g (instead of 802.11n or 802.11b) or use a different wireless channel.

You can also try placing the router under the bed, inside a shoe box or wrap a foil around the router antennas so that you can somewhat restrict the direction of signals.

Apply the Anti-Wi-Fi Paint – Researchers have developed a special Wi-Fi blocking paint that can help you stop neighbors from accessing your home network without you having to set up encryption at the router level. The paint contains chemicals that blocks radio signals by absorbing them. “By coating an entire room, Wi-Fi signals can’t get in and, crucially, can’t get out.”


STEP 7. UPGRADE YOUR ROUTER’S FIRMWARE

You should check the manufacturer’s site occasionally to make sure that your router is running the latest firmware. You can find the existing firmware version of your router using from the router’s dashboard at 192.168.*.


CONNECT TO YOUR SECURE WIRELESS NETWORK

To conclude, MAC Address filtering with WPA2 (AES) encryption (and a really complex passphrase) is probably the best way to secure your wireless network.

Once you have enabled the various security settings in your wireless router, you need to add the new settings to your computers and other wireless devices so that they all can connect to the Wi-Fi network. You can select to have your computer automatically connect to this network, so you won’t have to enter the SSID, passphrase and   other information every time you connect to the Internet.

Your wireless network will now be a lot more secure and intruders may have a tough time intercepting your Wi-Fi signals.

WHO IS CONNECTED TO YOUR WIRELESS NETWORK

If you are worried that an outsider may be connecting to the Internet using your Wireless network, try AirSnare – it’s a free utility that will look for unexpected MAC addresses on your Wireless network as well as to DHCP requests. Another option is that you open your router’s administration page (using the 192.168.* address) and look for the DHCP Clients Table (it’s under Status > Local Network on Linksys routers). Here you will see a list of all computers and wireless devices that are connected to your home network.

*It is also a good idea to turn off the router completely when you are not planning to use the computer for a longer period (like when you are out shopping). You save on electricity and the door remains 100% shut for wireless piggybackers.

**If you ever want to let a new device connect to your network, you will have to find its MAC address and add it to your router. If you simple want to let a friend connect to your wireless network one time, you can remove his MAC address from the router settings when he or she leaves your place.

Related Posts Plugin for WordPress, Blogger...

Labels

404 AdBlock Add-on Airtel GPRS Trick Airtel SMS Trick Alexa Amazon Amazon Kindle Amazon Prime Android Android 8 Android Oreo antivirus Apple Apple Mac ASCII Audacity Audio Authotkey Backup Balance Transfer in Vodafone Battery Bing Blogger Blogging Bookmarklet Browser Camera Chromebook clock Cloud colors command lines Computer Computer Tricks configuration Contact Creative Commons Credit Card CSS devolop DIY Doodle DOS Download Dropbox E-Mail eBook Email Email Attachment Embed Encryption English Error Evernote Eyes Facebook Facebook Tricks Feedburner Flipkart Font Foursquare Free Internet Free sms trick in Vodafone G Mail Gadget Game Getty Images GIF Gists Github Google Google AdSense Google Analytics Google Apps Google Chrome Google Contacts Google Currents Google DNS Google Docs Google Drive Google Earth Google Font Google Forms Google Images Google Map Google Photos Google Play Store Google Plus Google Print Google Reader Google Script Google Sheets Google Spreadsheet Google Translate GPRS Setting GPS Hacking Health App HelloFax Hindi Hoodie HTML Icons idea Image Editing Images IMEI Indian Railways Infographics Instagram Internet Internet Explorer Internet Tricks iOS iPad iPhone IRCTC iTunes iTV JavaScript JioCinema JioTV Junglee Kindle Language Translation Laptop Laptop. TV Life Time FREE GPRS Life-Style Link Linkedln Linux logo Make Money Online Microdoft Powerpoint Microdoft Word Microsoft Office Microsoft Outlook Mobile Mosaic Music Name Networking nexus Notepad OCR Online Shopping Open DNS OS Outlook Password PDF Petya Phillips Hue Lights Photogtraphy Pixel Play Station Podcasts Pokemon Pokemon Go Polls Print Productivity Proxy Server Pushbullet QR Code Ransomware Reddit Reliance Hack GPRS Reliance Jio RGB Ringtone Router RSS Safe Mode Samsung Galaxy S Scrabble Screen Capture Screen Sharing Screencast Secrets Security Send free sms from PC SEO Sierra Skype Slideshare SMBv1 SMS Snapchat Snapdeal Social Media Solution Sound Device Speech Recognition Sql Steam Sync Synology NAS Tata Docomo GPRS trick Teleprompter Torrent Trick Tricks TV Twitter UltraISO Unicode Unknown Extension Unlimited 2GB Unlimited 3GB Unlimited GPRS USB USB Security Key Video Editing virtual desktop Virus attack VLC Vodafone 110% working trick for GPRS Vodafone 3g Vodafone GPRS VPN wallpapers WannaCry Web Design Web Domain Website Wget Whatsapp WiFi Wikipedia Windows Windows 10 Windows 10 S Windows KN Windows Tricks windows updates Winows N Wolfarm Alpha WordPress XBox YouTube Zip
Twitter Delicious Facebook Digg Stumbleupon Favorites More