Showing posts with label Google Drive. Show all posts

Thursday, 28 September 2017

How to Sync Your Desktop PC with Google Drive and Google Photos


How to Sync Your Desktop PC with Google Drive and Google Photos


Google has been doing its part to make sure everyone has a backup of important data, and it recently released a new tool for Windows and Mac users to take that redundancy to the next level. Appropriately named Backup and Sync, it’s a quick and effective tool to store your important files in the cloud.

Backup & Sync Replaces Google Drive and Google Photos Uploader


Before we get into it, let’s first talk a little bit about what Backup and Sync actually is. If you’re a heavy Google user, you’re probably already aware of Google’s other sync tools: Google Drive and Google Photos Uploader. Those have both now been rolled into Backup and Sync, so you can control all of your files, videos, images, and more from one app. This is where you’ll control which folders from your Drive are synced to and from your PC or Mac, as well as specifying which image folders should get backed up to your Photos library.

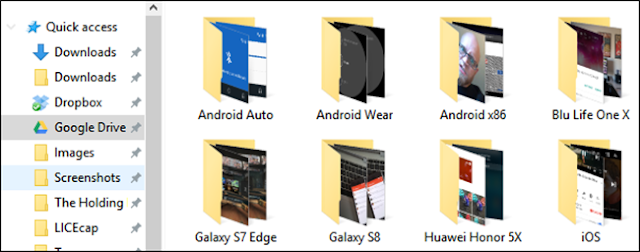
Google Drive is really the core of the Backup and Sync tool, so if you never used the Drive app then a bit of explanation may be in order. Essentially, this new tool will allow you to sync your Google Drive cloud storage with your computer—be that the entire Drive or just specific files and folders. These are then treated as local files on the computer, so your important stuff is always up to date on every computer you own (and in the cloud).

The only exception here are Google Docs files (Sheets, Docs, Slides)—those are still online-only, as Backup and Sync will not download them for offline access. It will, however, put icons in the Google Drive folder so you can double-click them as if they were normal documents (you’ll just need an internet connection to view and edit them.)

How to Sync Your Desktop PC with Google Drive and Google Photos

Backup and Sync also adds one more tool to the equation: the option to back up specific folders from your PC or Mac to your Google Drive. For example, I use Google Drive to store almost everything, so it’s accessible from all of my other device. But the screenshots folder on my Windows machine isn’t in my Drive folder—it’s in my PC’s Pictures folder. With Backup and Sync, I can then access folder on any of my other devices, any time.

Sound awesome? It is. Here’s how to set it up and get everything synced.

Step One: Download and Install Backup and Sync

Naturally, the first thing you’ll need to do is actually download the Backup and Sync tool. Make sure to grab the appropriate download for your device (Mac or PC). If you already have Google Drive installed, don’t worry—this tool will automatically replace it, no uninstallation necessary.

It should download pretty quickly, and you’ll just need to launch the installer when it’s finished. If you’re using Google Chrome (as you should be), just click the download button at the bottom of the page.

A few seconds later, Backup and Sync will be installed. When it was finished, mine told me to restart my computer for reasons unknown to me—I didn’t do it, and everything still worked fine. Take that, Google.

If you previously had the Google Drive app installed, Backup and Sync should automatically log in to your Google Account. If not, you’ll need to log in. After that, a quick splash screen will let you know what the app is all about: backing up your stuff. Click “Got it” to move into the app.

How to Sync Your Desktop PC with Google Drive and Google Photos

Step Two: Choose Which Folders Will Get Synced from Google Drive

The Backup and Sync tool is split up into two main sections:

* Google Drive: This performs the same function as the original Google Drive app. You choose what folders to sync from your Google Drive cloud storage, and they’ll appear in a Google Drive folder on your PC. Anything you put into that folder will also sync to Google Drive.

* My Computer: This part is new, and allows you to sync files between your computer and Drive without putting them in the dedicated Google Drive folder. Just pick the folders from your computer you want to sync, and they’ll sync to your cloud storage (though they’ll appear in a separate section of the Google Drive interface, rather than with all your other Drive files.)

Let’s start with the Google Drive section first—it’s second in the list, but it’s much simpler and will be familiar to anyone who’s used Google Drive in the past.

You have a few specific options in this menu. You can:

* Sync My Drive to this Computer: Use this option to enable/disable syncing your Google Drive to your computer.

* Sync Everything in my Drive: Literally syncs the entire contents of your Google Drive to your computer.

* Sync Only These Folders: Allows you to specify which folders to sync from Drive to your computer.

These are really straightforward—just choose what you’d like to sync and be done with it.

How to Sync Your Desktop PC with Google Drive and Google Photos'

Step Three: Choose Other Folders On You PC to Sync

Next, let’s look at the My Computer section, where you can select other folders on your PC to sync. There are a few options already available here: Desktop, Documents, and Pictures. You can simply tick the box next to the option to completely back up everything from that location to your Google Drive. Simple.

How to Sync Your Desktop PC with Google Drive and Google Photos

But if you’d like to get a little more granular and only back up a certain folder, you can do this by clicking the “Choose Folder” option. Just navigate to the folder you’d like to back up, and click “Select Folder.” That’s all there is to it.

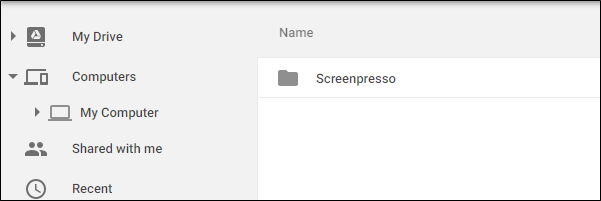
NOTE: Files you sync from outsdie your Drive folder won’t show up in Drive alongside all your other files. To access those files, head to Google Drive on the web and click on “My Computers” in the left menu. This option is also available in the Drive mobile apps.

How to Sync Your Desktop PC with Google Drive and Google Photos


If you want a file or folder to show up under “My Drive”, you’ll need to sync it the old-fashioned way: by putting it inside the Google Drive folder on your PC.

Step Four: Tweak Your Photo Uploading Settings

Below the folder options in the “My Computer” section, you can also specify how you’d like to back up images (if you choose to back up images from your PC, of course): Original Quality, which will take up space in your Drive, or High Quality, which won’t take up any space in your Drive. The latter uses intelligent compression algorithms to shrink the size of the image without reducing quality, the same as it does in the Google Photos app on Android and iOS devices.

You can also specify how you’d like to control delete options: Remove Items Everywhere, Don’t Remove Items Everywhere, or Ask Me Before Removing Items Everywhere. The last option is set as the default, which really makes the most sense anyway. Feel free to change this according to your specific needs.

How to Sync Your Desktop PC with Google Drive and Google Photos


Lastly, you can tick the box in the Google Photos section to automatically scan your computer for new pictures and upload them to Google Photos. There’s also a small option at the bottom labeled “USB Devices & SD Cards,” which you can use to automatically upload files from your digital camera or USB drives if you’d like. Just plug in the drive or card and specify what you’d like to do with it.

A Few Additional Notes about Backup and Sync

That’s really all there is to Backup and Sync, but there are a couple of other things worth mentioning:

* You can rename your computer by clicking on the “My Computer” (or similar) text at the top of the “My Computer” page and giving it a specific name.

* You can easily upgrade your Drive storage or disconnect your account from the “Settings” tab.

* System startup rules, file sync icon, and right click settings can also be modified on the Settings tab.

* Backup and Sync’s network activity can be restricted in the “Network Settings” section of the Settings tab. Proxies can be specific, and download/upload rates capped if need be.

* The Backup and Sync tool will live in your computer’s system tray as long as it’s running. To access its settings, just click its icon in the tray, click the three-dot menu in the upper right corner, and choose “Preferences.”

How to Sync Your Desktop PC with Google Drive and Google Photos

That’s pretty much it, really. It’s a simple tool.

Thanks for landing on this post, If you like my post then give your opinion and feedback in comment box.


TAGS:- #How to Sync Your Desktop PC with Google Drive and Google Photos, #spotify not syncing local files, #How to Sync Your Desktop PC with Google Drive, #how to sync your desktop with dropbox, #how to sync your desktop with onedrive, #how to sync your local file with dropbox, #how to sync your local file with google drive, #How to Sync Your PC with Google Drive and Google Photos, #local files sync to spotify, Local Files Syncing, Desktop Files Syncing, #Your Desktop PC with Google Drive and Google Photos

How to Host your Websites on Google Drive


If you are looking for a place to quickly host your websites but don’t have access to any web server, Google Drive is a great alternative. You can use Google Drive to host basic websites or even complex JavaScript based web apps. You may upload and publish any kind of static content* on your website including HTML pages, images, CSS, icons, audio & video files including podcasts.

How to Host your Websites on Google Drive

FREE WEB HOSTING WITH GOOGLE DRIVE


If you are using the old Google Drive, you can easily host websites on Drive. First upload your website files to a folder inside Google Drive, set the sharing permissions of that folder as public, open the index.html file in the Google Docs viewer and then click the “Preview” link to get the URL of your website.

However if you have migrated to the new Google Drive, you’ll be disappointed to learn that Google has dropped the web hosting feature. You can still create public folders inside Drive but the option to publish that folder as a website is gone.

No worries as there’s still an easy workaround that will let you publish your websites on to Google Drive in a single step.

FROM DESKTOP TO GOOGLE DRIVE IN ONE STEP

Step:-1.) Just put all your website file in a zip file – or you may use this zip file
Step:-2.) click here to upload that zip file to your Google Drive.
Step:-3.) Once the file has uploaded, the tool will generate the public URL of your website in the same step.

If you are using the tool for the first time, you may have to click the “Authorize” button since the script needs permission to upload that zip file to your Google Drive.

Internally, this little Google Script is doing all the hard work for you. When you click upload, the app creates a folder inside your Google Drive.

Step:-4.) Changes the sharing permissions to public (anyone can view, you can edit) and then generates the googledrive.com URL using the ID of the new folder.

Also Read:-
There are a few things you need to know before hosting websites on Google Drive. One, you need to have an index.html as that file will be served when someone tries to access the homepage of your site. Second, Google Drive websites have a URL structure like googledrive.com/host/ and there’s no way to change the default URL.
If you are hosting a website on Google Drive but wish to serve it under your own custom domain, that’s not possible yet but you can follow a workaround.

The trick is easy – you just have to wrap your Google Drive website URL inside an IFRAME tag as shown in the following snippet:

<html>
 <head>
  <style>
    body { margin:0; padding:0; }
    iframe { position: absolute; height: 100%; width: 100%; }
  </style>
  <title>Google Drive Website</title>
 </head>    
 <body>
   <iframe src="https://googledrive.com/host/ABCD/" frameborder="0"></iframe>
 </body>
</html>
The height and width attributes of the IFRAME tag should be set to 100% for the Google Drive website to occupy the entire screen. The only downside is that the URL in the address bar won’t change if you open a different page of the website since you are now browsing inside an embedded page.

Google Drives serves your website over HTTPS and thus can also be used for hosting custom Facebook Pages since Facebook requires that custom pages are only served over secure HTTP.

[*] Google Drive cannot be used for serving dynamic pages like those generated through PHP scripts on a WordPress website.

Thanks for landing on this post, If you like my post then give your opinion and feedback in comment box.


Tags:- #How to Host your Websites on Google Drive, #Google drive host, #Free google hosting, #Host website in free of cost, #Host website in Google, #Computer tips tricks, #host website on google drive 2017, #google drive web hosting alternatives, #how to host a website for free with domain name, #google web hosting for small business, #how to host your website on google for free, #how to host your website on google, #google drive hosting website, #google drive hosting 2017, #How to host a website with Google Drive, #Google Drive web hosting platform, host your website on google drive 2017, google drive host website, #google drive host static website

Thursday, 24 August 2017

What’s the Best Way to Back Up My Computer?

What’s the Best Way to Back Up My Computer?

Everyone loses data at some point in their lives. Your computer’s hard drive could fail tomorrow, ransomware could hold your files hostage, or a software bug could delete your important files. If you’re not regularly backing up your computer, you could lose those files forever.

Backups don’t have to be hard or confusing, though. You’ve probably heard about countless different backup methods, but which one is right for you? And what files do you really need to back up?

It’s All About Your Personal Data


Let’s start with the obvious: what do you need back up? Well, first and foremost, you need to back up your personal files. You can always reinstall your operating system and redownload your programs if your hard drive fails, but your own personal data is irreplaceable.

Any personal documents, photos, home videos, and any other data on your computer should be backed up regularly. Those can never be replaced. If you’ve spent hours painstakingly ripping audio CDs or video DVDs, you may want to back those files up, too, so you don’t have to do all that work over again.

Your operating system, programs, and other settings can also be backed up. You don’t have to back them up, necessarily, but it can make your life easier if your entire hard drive fails. If you’re the type of person that likes to play around with system files, edit the registry, and regularly update your hardware, having a full system backup may save you time when things go wrong.

The Many Ways to Back Up Your Files

There are many ways to back up your data, from using an external drive to backing up those files on a remote server over the Internet. Here are the strengths and weaknesses of each:

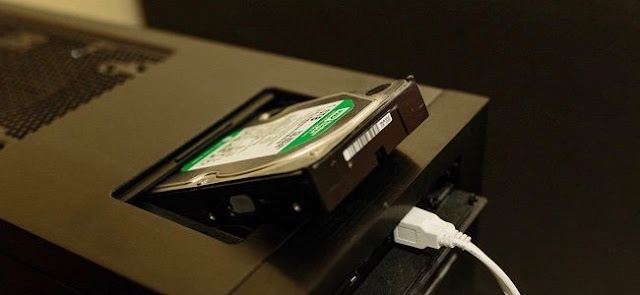
* Back Up to an External Drive: If you have an external USB hard drive, you can just back up to that drive using your computer’s built-in backup features. On Windows 10 and 8, use File History. On Windows 7, use Windows Backup. On Macs, use Time Machine. Occasionally connect the drive to the computer and use the backup tool, or leave it plugged in whenever your home and it’ll back up automatically. 

Pros: Backing up is cheap and fast.

Cons: If your house gets robbed or catches on fire, your backup can be lost along with your computer, which is very bad.

What’s the Best Way to Back Up My Computer?

* Back Up Over the Internet: If you want to ensure your files stay safe, you can back them up to the internet with a service like BackBlaze. BackBlaze is the well-known online backup service we like and recommend since CrashPlan no longer serves home users, but there are also competitors like Carbonite and MozyHome. For a low monthly fee (about $5 a month), these programs run in the background on your PC or Mac, automatically backing up your files to the service’s web storage. If you ever lose those files and need them again, you can restore them. 

Pros: Online backup protects you against any type of data loss–hard drive failure, theft, natural disasters, and everything in between. 

Cons: These services usually cost money (see the next section for more details), and the initial backup can take much longer than it would on an external drive–especially if you have a lot of files.

What’s the Best Way to Back Up My Computer?

* Use a Cloud Storage Service: Backup purists will say this isn’t technically a backup method, but for most people, it serves a similar enough purpose. Rather than just storing your files on your computer’s hard drive, you can store them on a service like Dropbox, Google Drive, Microsoft OneDrive, or a similar cloud storage service. They’ll then automatically sync to your online account and to your other PCs. If your hard drive dies, you’ll still have the copies of the files stored online and on your other computers. 

Pros: This method is easy, fast, and in many cases, free, and since it’s online, it protects you against all types of data loss. 

Cons: Most cloud services only offer a few gigabytes of space for free, so this only works if you have a small number of files you want to back up, or if you’re willing to pay for extra storage. Depending on the files you want to back up, this method can either be simpler or more complicated than a straight-up backup program.

What’s the Best Way to Back Up My Computer?

While backup programs like BackBlaze and cloud storage services like Dropbox are both online backups, they work in fundamentally different ways. Dropbox is designed to sync your files between PCs, while BackBlaze and similar services are designed to backup large amounts of files. BackBlaze will keep multiple copies of different versions of your files, so you can restore the file exactly as it was from many points in its history. And, while services like Dropbox are free for small amounts of space, BackBlaze’s low price is for as big a backup as you want. Depending on how much data you have, one could be cheaper than the other.

BackBlaze and Carbonite do have one big limitation you should keep in mind. If you delete a file on your computer, it will be deleted from your online backups after 30 days. You can’t go back and recover a deleted file or the previous version of a file after this 30 day period. So be careful when deleting those files if you might want them back!

One Backup Isn’t Enough: Use Multiple Methods

So which should you use? Ideally, you’d use at least two of them. Why? Because you want both offsite and onsite backups.

“Onsite” literally means backups stored at the same physical location as you. So, if you back up to an external hard drive and store that at home with your home PC, that’s an onsite backup.

Offsite backups are stored at a different location. So, if you back up to an online server, like BackBlaze or Dropbox, that’s an offsite backup.

Onsite backups are faster and easier, and should be your first line of defense against data loss. If you lose files, you can quickly restore them from an external drive. But you shouldn’t rely on onsite backups alone. If your home burns down or all the hardware in it is stolen by thieves, you’d lose all your files.

Offsite backups don’t have to be a server on the Internet, either, and you don’t have to pay a monthly subscription for one. You could back up your files to a hard drive and store it at your office, at a friend’s house, or in a bank vault, for example. It’d be a bit more inconvenient, but that’s technically an offsite backup.

Similarly, you could also store your files in Dropbox, Google Drive, or OneDrive and performing regular backups to an external drive. Or you could use BackBlaze to back up online and Windows File History to create a local backup. There are a lot of ways to use these services in tandem, and it’s up to you how to do it. Just make sure you have a solid backup strategy, with onsite and offsite backups, so you have a wide safety net against ever losing your files.

Automate It!

All that may sound complicated, but the more you automate your backup system, the more frequently you’ll be able to back up and the greater the odds you’ll stick with it. That’s why you should use an automated tool instead of copying files to an external drive by hand. You can just set it up once, and forget it.

That’s one reason we really like online services like BackBlaze. If it’s backing up to the internet, it can automatically do that every single day. If you have to plug in an external drive, you have to put in more effort, which means you’ll back up less often and you may eventually stop doing it. Keeping everything automatic is well worth the price.

If you don’t want to pay anything and want to primarily rely on local backups, consider using a file-syncing service like Dropbox, Google Drive, or Microsoft OneDrive to synchronize your important files online. That way, if you ever lose your local backup, you’ll at least have an online copy.

Ultimately, you just need to think about where your files are and ensure you have multiple copies at all times. Ideally, those copies should be in more than one physical location. As long as you’re actually thinking about what you’ll do if your computer dies, you should be way ahead of most people.

Thanks for landing on this post, If you like my post then give your opinion and feedback in comment box.


TAGS:- #What’s the Best Way to Back Up My Computer?, #Back Up My Computer, crashplan exiting consumer market, #Best Way to Back Up My Computer, #what is the best way to backup my computer to an external hard drive, #how to backup computer windows 10, #how to backup computer windows 10, #how do i backup to a flash drive?, #how do i backup my computer to a flash drive?, #how to backup laptop to external hard drive, #how to backup computer to external hard drive, #how to backup computer mac, #best way to backup computer to external hard drive, #how can i backup computer to external hard drive

Wednesday, 26 July 2017

How to Save Your Message History on WhatsApp

Five Methods:  On an Android  On an iPhone  On a Windows Phone  On a Nokia Phone  On a Blackberry

WhatsApp  is a cross-platform messaging app that allows users to communicate over Internet data or Wi-Fi without having to pay for SMS. WhatsApp provides two options for users who wish to save their chat history: creating a backup of it or exporting it as a .txt file that can be sent over email. This article will show you both methods.

How to Save Your Message History on WhatsApp

# Method 1 of 5: On an Android


1. Launch WhatsApp on your smartphone.

2. Tap "Settings" from the menu.

3. Tap "Chat Settings."

4. Tap "Backup Conversations."

5. Export your chat history.  Go to your chats screen. Tap and hold on a conversation or group conversation you would like to send. Select "Email conversation," and decide whether you'd like to send the media as well. An email will be composed with your chat history attached as a .txt file.

# Method 2 of 5: On an iPhone


1. Back up chats in iTunes or iCloud.  Whenever you Back Up Your iPhone, your WhatsApp conversations will be backed up as well.


2. Restore your chat history.  To restore your chat history, you'll need to restore the entire backup, which includes your settings and data for the rest of your phone and its apps.

3. Export your chat history.  Launch WhatsApp and go to Settings >> Email Conversation.  From the Chat History screen, select the conversation you would like to save. Decide whether you want to email the history with or without the media. Type in an email address and press Send.


# Method 3 of 5: On a Windows Phone


1. Launch WhatsApp and open the main chat screen.

2. Tap the three dots in the bottom right corner for the menu.

3. Go to Settings >> Backup.

4. Export your chat history.  Launch WhatsApp and open the conversation you wish to send. Tap the three dots in the bottom right hand corner, then go to Info >> Email Chat History.

# Method 4 of 5: On a Nokia Phone


1. Wait for automatic backup. 
You cannot backup your chats on Nokia S40 phones.  If you have a Nokia S60, your chats will backup automatically every day at 4 a.m.

2. Use manual backup.  For other Nokia phones, you can back up your chats manually. #*Go to Settings >> Chat History >> Backup Chat History.
  • Tap "Yes" to save your messages.

3. Export your chat history
  • Nokia S60: Launch WhatsApp. From the main screen, go to Options >> Settings >> Chat History >> Send Chat History. Select the chat you want to email. An email will be composed with your chat history attached as a .txt file.
  • On a Nokia S40: Launch WhatsApp and open the conversation you want to email. Tap Options >> Chat History >> Email. An email will be composed with your chat history attached as a .txt file.


# Method 5 of 5: On a Blackberry


1. Launch WhatsApp.

2. Go to Settings >> Media Settings

3. Set "Message Settings to Media Card.

4. Export your chat history. Launch WhatsApp from your smartphone and go to your chats screen.
Highlight the conversation or group conversation you would like to send. Press the BlackBerry button, then select "Email conversation."


Warnings:-

  • If you send the chat history with media attached, it will be a much larger file size and may take more time and data to send. If your phone has a message size restriction, it may truncate or fail to send your entire chat history.
  • The backup feature is only available in WhatsApp versions 2.9.2 and later. If you are running an earlier version of WhatsApp, please update to the latest version in order to make use of this feature.
  • There is no way to back up WhatsApp messages on Nokia S40 phones

Saturday, 8 July 2017

Add the Same File to Multiple Folders in Google Drive without Copying

Gmail works around the concept of tags (or labels) and any email message can belong to one or more tags. Google Drive has folders instead of tags and thus any file or folder in Drive can have a single parent folder. For instance, if you have uploaded a presentation file in Folder-A, it can’t simultaneously exist in Folder-B. Right?

Well, you’ll will be surprised to know that Google Drive does allow you to place any file inside one or more folders without you having to create multiple copies of that file. This makes Drive organization easier and if you edit the file inside one folder, all the other instances are updated as well since they are essentially pointing to the same file.

How to Add a File to Multiple Folders in Google Drive


Here’s how you can place existing files or folders inside different multiple folders on Google Drive without making copies of the file.

Add the Same File to Multiple Folders in Google Drive without Copying

 
Step-1. Open the Google Drive website in your desktop’s web browser and select one or more files or folders. You can use the Control key on Windows, or Command key on Mac, to select non-consecutive files and folders. 

Step-2. Now press Shift + Z and you’ll see an “Add to Folder” pop-up (see screenshot).  

Step-3. Next select the folder where you wish to add the selected files and click OK.

That’s it.

You have neither copied nor moved the files to the destination folder, you’ve merely created references or aliases to files inside the other folder. You can use the Shift+Z keyboard shortcut again to add the selected files to any other folders in your Google Drive.

This little feature will come handy in several cases. For instance, if you have a folder of pictures inside Google Drive, you can use Shift+Z to place some of these pictures into another shared folder. You need not create duplicate files in your Drive (saving storage space) and if you remove a picture from the parent folder, the file is gone from other folders too.

Remove Files Placed in Multiple Folders


Let’s say you have a Folder B that contains references to a file placed in Folder A. If you move the Folder B to trash or if you remove the file from Folder B, the original file is deleted from the original Folder A as well. In such cases you may need to remove the placed file from Folder B before deleting the folder.

Add the Same File to Multiple Folders in Google Drive without Copying


In Google Drive, select the file that is placed in multiple folders and open the activity sidebar. Here you’ll see a list of all folder that the file belongs to. All you need to do is click the little [x] symbol to remove that file from any folder in the list.

Add Files to Multiple Folders with Code


If you know Google Scripts, you can place a file or folder current folder into multiple folders using the Drive API as show below. [H/t David Scotts]

function organizeFolders() {
 
  // Parent Folders
  var parentA = DriveApp.createFolder("Dad"); 
  var parentB = DriveApp.createFolder("Mom");
 
  // Child folder inside Parent Folder A
  var child   = parentA.createFolder("Child");
 
  // Place Child Folder inside another Parent Folder B 
  parentB.addFolder(child);
 
}

Saturday, 3 June 2017

How to backup iPhone photos in Google Drive

Google+ not only provides social media connection, it can also be used to save copies of your precious photos on your smartphone. If you’re an iPhone user, you can use the Google+ app to keep an online copy of your pictures. Creating a backup for your photos on your iPhone is very easy and simple.

How to backup iPhone photos in Google Drive


Steps

1. Download the Google+ app. Open the App Store from your iPhone’s home screen and search for the Google+ app for iOS. Tap “Install” beside the application’s name to download and install it on your device.

2. Launch the Google+ app. Once the installation is complete, tap the red “g” icon from the homescreen of your iPhone to open the Google+ mobile app.

3. Log into your Google account. Enter your username and password on the allocated text fields, and tap the “Sign In” button to log into your Google account.

* If you don’t have a Google account yet, simply tap the “Create an account” link at the bottom center of the app screen and enter your full name, username of choice, and password to get an account instantly.

4. Open the app menu. Tap the menu button on the top left corner and the app menu panel will slide out from the left-hand side of your device screen.

5. View the Google+ app settings. Tap the gear icon on the top right corner of the menu to view Google+ application settings.

6. Access the Camera and Photos settings. Scroll down the Settings menu, and tap “Camera and Photos” to open a list of customizable options for managing your Google+ photos and videos.

7. Back up your photos. Tap the “Auto Backup” toggle switch and set it green to enable it. Once the app’s auto-backup is turned on, photos saved on your iPhone will be synced and saved on your Google+ account.

Saturday, 27 May 2017

How to Remove Password from PDF Files | PDF password remove

Good Noon Friends, Mostly we are received a PDF file from bank, office or other sector. We archive these PDFs into Google Drive but, because these files are protected with a password and its very difficult to remember all documents password. So here is a way to  Remove Password from PDF Files in these simple steps.


Removing Password from a PDF File


Google Drive is already protected with 2 layers of security – password and 2-factor authentication – it should be OK if we remove the password protection from PDF files before uploading them to Drive.

There is a software program available that can remove password protection from PDF files is already installed on your computer. It’s called Google Chrome.

Google Chrome has a built-in PDF reader and a PDF writer and we can combine the two features to remove the password from any PDF document. OK here is the process:

Steps:-

  1. Drag any password protected PDF file into your Google Chrome browser.
  2. Google Chrome will now prompt you to enter the password of the file. Enter the password and hit Enter to open the file.
  3. Now go to the File menu in Google Chrome and choose Print (or press Ctrl+P on Windows or Cmd+P on Mac). Choose the destination printer as “Save as PDF” and click the Save button.

Google Chrome will now save the PDF to your desktop but without the password protection. If you re-open this PDF in Chrome, it would no longer require a password to open. Thank you Ivan Sunga for the tip.


Alternatively, if you have enabled Google Cloud Print, you can choose the destination as “Save to Google Drive” in the print dialog and the unprotected version of the PDF will be sent straight to your Google Drive from Chrome.

Open the special page chrome://plugins and enable the option that says “Chrome PDF Viewer” to let Chrome natively handle PDF files.
 

Remove PDF Passwords without Chrome


If you are not a Google Chrome user, download this free Windows utility called BeCyPDFMetaEdit to remove passwords from PDF files.

Steps:-

  • First launch the program and it will ask your for the location of the PDF file
  • Before you select and open the PDF, change the mode to “Complete Rewrite,” 
  • Then switch to the Security tab and set the “Security System” to “No encryption.” 
  • Click the Save button and your PDF will no longer require a password to open.

Monday, 22 May 2017

Create Direct Links to your Files on Google Drive

You can upload files of virtually all types to your Google Drive – from documents to movies to zip archives – and people with whom you have shared the file can easily view them in the browser itself. The Google Docs web viewer is pretty capable and can render all the popular formats including Photoshop files and AutoCAD drawings.

That’s a useful feature but sometimes you may want to bypass the built-in Google Docs viewer and force the browser to download the file instead of opening it. Thus if a user has Photoshop on their computer, the PSD file that you have shared through Google Drive will open in Photoshop and not in their web browser.


CREATE DIRECT LINKS AND SKIP THE WEB VIEWER

Google Drive doesn’t offer a simple option for creating these “direct download” link but you can easily create them by slightly modifying the generated URLs. Here’s the trick.

A file hosted on Google Drive has a shared link that looks like this:

https://drive.google.com/file/d/FILE_ID/edit?usp=sharing
When you access this link, it will render the file in the browser but if you can rewrite this URL slightly, the link, when clicked, will download the corresponding file in the user’s browser instead of opening it in the browser. The modified URL would be:

https://drive.google.com/uc?export=download&id=FILE_ID
All you have to do is make note of the FILE_ID in the original URL and use it in the modified URL. For example, here’s an image file hosted on Google Drive that will open in the browser and here’s the modified URL that forces the browser to download the file.


DIRECT DOWNLOAD LINKS FOR GOOGLE DOCUMENTS

The trick works for native Google Documents too though the URL format is a little different.

Google Docs: When you share a Google document, the URL would be:

https://docs.google.com/document/d/FILE_ID/edit?usp=sharing
Replace /edit with /export and add the file format that the document should be saved as and your download link is ready.
https://docs.google.com/document/d/FILE_ID/export?format=doc https://docs.google.com/document/d/FILE_ID/export?format=pdf
The above links will now download the same Google document in Word (.docx) and PDF formats. You can also use “txt”, “html” and “odt” for the download format.

Google Presentations: Google Docs offer an even simpler URL scheme for creating direct links to Google Presentations. The original shared links are of the following format:

https://docs.google.com/presentation/d/FILE_ID/edit?usp=sharing
The direct links for downloading the same presentation deck in PowerPoint (.pptx) and PDF formats are below:

https://docs.google.com/presentation/d/FILE_ID/export/pptx https://docs.google.com/presentation/d/FILE_ID/export/pdf
Google Spreadsheets: Open your Google Spreadsheet in the browser, make the sheet Public (or Anyone with a link) and make a note of the shared URL. It should be something like this:

https://docs.google.com/spreadsheets/d/FILE_ID/edit?usp=sharing
The direct download links use a similar format as Google Documents and will read like:
https://docs.google.com/spreadsheets/d/FILE_ID/export?format=xlsx https://docs.google.com/spreadsheets/d/FILE_ID/export?format=pdf
BONUS TRICK – MAKE A COPY

Google Spreadsheets offers an additional feature that is not available in Documents and Presentations (at least yet). You can create links to Google Sheets that will automatically create a copy of your Google Sheet in the Google Drive of the person with whom you have shared the sheet.

:Before: https://docs.google.com/spreadsheets/d/FILE_ID/edit?usp=sharing

 After: https://docs.google.com/spreadsheet/ccc?key=FILE_ID&newcopy=true

The newcopy=true parameter did the trick.

Related Posts Plugin for WordPress, Blogger...

Labels

404 AdBlock Add-on Airtel GPRS Trick Airtel SMS Trick Alexa Amazon Amazon Kindle Amazon Prime Android Android 8 Android Oreo antivirus Apple Apple Mac ASCII Audacity Audio Authotkey Backup Balance Transfer in Vodafone Battery Bing Blogger Blogging Bookmarklet Browser Camera Chromebook clock Cloud colors command lines Computer Computer Tricks configuration Contact Creative Commons Credit Card CSS devolop DIY Doodle DOS Download Dropbox E-Mail eBook Email Email Attachment Embed Encryption English Error Evernote Eyes Facebook Facebook Tricks Feedburner Flipkart Font Foursquare Free Internet Free sms trick in Vodafone G Mail Gadget Game Getty Images GIF Gists Github Google Google AdSense Google Analytics Google Apps Google Chrome Google Contacts Google Currents Google DNS Google Docs Google Drive Google Earth Google Font Google Forms Google Images Google Map Google Photos Google Play Store Google Plus Google Print Google Reader Google Script Google Sheets Google Spreadsheet Google Translate GPRS Setting GPS Hacking Health App HelloFax Hindi Hoodie HTML Icons idea Image Editing Images IMEI Indian Railways Infographics Instagram Internet Internet Explorer Internet Tricks iOS iPad iPhone IRCTC iTunes iTV JavaScript JioCinema JioTV Junglee Kindle Language Translation Laptop Laptop. TV Life Time FREE GPRS Life-Style Link Linkedln Linux logo Make Money Online Microdoft Powerpoint Microdoft Word Microsoft Office Microsoft Outlook Mobile Mosaic Music Name Networking nexus Notepad OCR Online Shopping Open DNS OS Outlook Password PDF Petya Phillips Hue Lights Photogtraphy Pixel Play Station Podcasts Pokemon Pokemon Go Polls Print Productivity Proxy Server Pushbullet QR Code Ransomware Reddit Reliance Hack GPRS Reliance Jio RGB Ringtone Router RSS Safe Mode Samsung Galaxy S Scrabble Screen Capture Screen Sharing Screencast Secrets Security Send free sms from PC SEO Sierra Skype Slideshare SMBv1 SMS Snapchat Snapdeal Social Media Solution Sound Device Speech Recognition Sql Steam Sync Synology NAS Tata Docomo GPRS trick Teleprompter Torrent Trick Tricks TV Twitter UltraISO Unicode Unknown Extension Unlimited 2GB Unlimited 3GB Unlimited GPRS USB USB Security Key Video Editing virtual desktop Virus attack VLC Vodafone 110% working trick for GPRS Vodafone 3g Vodafone GPRS VPN wallpapers WannaCry Web Design Web Domain Website Wget Whatsapp WiFi Wikipedia Windows Windows 10 Windows 10 S Windows KN Windows Tricks windows updates Winows N Wolfarm Alpha WordPress XBox YouTube Zip
Twitter Delicious Facebook Digg Stumbleupon Favorites More