Showing posts with label Google Chrome. Show all posts

Thursday, 28 September 2017

Fix DNS Error Problem Reliance Jio 4G


Hi friends, As Jio offered free internet, free voice calls, free messages, it was not surprising that customers stood in queues to get hold of one Jio SIM. Reliance Jio was the solution India was looking for, a country where 4Mbps speed is a big deal. Today Way2trick sharing a trick to Fix DNS Error Problem Reliance Jio 4G wifi connection.

Fix DNS Error Problem Reliance Jio 4G

Reliance Jio are providing this services for free that is an awesome thing but due to increase in Jio users, speed dropped drastically and now people are facing DNS error due to which they are not able to use the internet.

Also Read:-


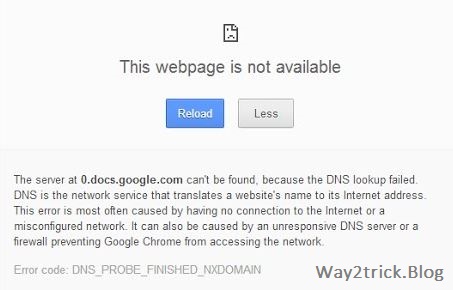
The DNS Error goes like this:-

"DNS_PROBE_FINISHED_NO_INTERNET"


Steps:- How to Fix DNS Error Problem in Reliance Jio 4G


For Windows:-

1. Open run (win+R).

2. Type ncpa.cpl

3. Right click on your WIFI and click on Properties .

4. Windows may prompt you for permission to make network setting changes.

5. Highlight ‘Internet Protocol Version 4’ and click Properties.

6. Click the radio button ‘Use the following DNS server addresses:’ and type 208.67.222.222 and 208.67.220.220 in the Preferred DNS server and Alternate DNS server fields.

7. Click OK button, then again OK button. Finally, close the Network and Sharing Center window.


For Mac OS X:-

1. Go to System Preferences.

2. Click on Network.

3. Select the first connection in your list and click Advanced.

4. Select the DNS tab and add 208.67.222.222 and 208.67.220.220 to the list of DNS servers.

5. Click OK.

Thanks for landing on this post, If you like my post then give your opinion and feedback in comment box.


Tags:- #Reliance Jio 4G Server Not Found DNS Error Problem Fixed, #How to fix the DNS Error Problem Reliance Jio 4G, #Fix DNS Error Problem Reliance Jio 4G, #Reliance jio dns, #DNS error, #How to fix DNS error , #DNS error solution, #Reliance jio error, #Way2trick, , #jio dns server address, #jio dns server problem, #Fix DNS error problem, #reliance jio dns server not responding, #jio dns problems how to fix, #reliance jio dns server problem, #jio dns server problem, #jio dns, #jio dns error

Monday, 14 August 2017

How to Change User Agent String in Google Chrome

You can do lot of interesting things on the web if you know how to modify the user-agent string of your web browser.


How to Change User Agent String in Google Chrome

For instance, change the Chrome’s user-agent string to that of iPhone Safari and you’ll be to read popular magazines for free. Or change the user-agent to Googlebot and you can read Wall Street Journal stories without a subscription. Similarly, if you use the user agent of iPad on your desktop, Google will render the tablet version of Gmail which is more beautiful than the original desktop version.

While it is relatively easy to edit the User-Agent string of Firefox, IE, Flock or Apple Safari through add-ons and registry hacks but you don’t have that luxury in Chrome since Google’s browser doesn’t support external add-ons yet.


HOW TO SWITCH USER AGENT OF GOOGLE CHROME

It is however possible to change the user-agent of Google Chrome via the following hack – open Chrome.dll file inside a Hex viewer, search for the Chrome User Agent string and overwrite (not insert) that with the user-agent of another browser.  Here are the full steps involved:

0. Make a backup of chrome.dll file – the file is available in the 0.2.xx folder of your Chrome installation folder (refer to #2).

1. Open chrome.dll inside Xvi32 and search for a patten that matches the default user agent string for Google Chrome :

Mozilla/5.0 (Windows; U; Windows NT 5.1; en-US) AppleWebKit/525.13 (KHTML, like Gecko) Chrome/0.X.Y.Z Safari/525.13.


2. Point the cursor to the letter M and choose Edit -> Overwrite String. Paste the user-agent of any other browser here. For instance, the strings for iPhone and Google spiders are:

Mozilla/5.0 (iPhone; U; CPU like Mac OS X; en) AppleWebKit/420+ (KHTML, like Gecko) Version/3.0 Mobile/1A543 Safari/419.3

Mozilla/5.0 (compatible; Googlebot/2.1; +http://www.google.com/bot.html)

3. Close Google Chrome (if running) and then save the chrome.dll file inside the hex editor. Restart chrome.exe and type about: in the address bar to confirm if the user agent has changed. If you have trouble opening chrome after making the above changes, just delete the modified chrome.dll file and replace it with the old backup.

If you plan to use this trick more frequently, a better option is that you create multiple copies of chrome.dll – one per user agent. Now if you want Chrome to emulate IE or Firefox, just make rename the chrome-firefox.dll or chrome-iphone.dll to chrome.dll.

Thanks for landing on this post, If you like my post then give your opinion and feedback in comment box.


Tags:- #Chrome user agent string, #chrome user agent string windows, #chrome user agent string list, #chrome user agent string android, #chrome user agent string iPhone, #chrome user agent string safari, #user agent string, #User-Agent Switcher for Chrome, #Computer tricks and tips, #computer problems solution, #way2trick

Thursday, 10 August 2017

How to Remove Ads on Google Chrome Using AdBlock

There are many Google Chrome extensions that block ads, but AdBlock and Adblock Plus are by far the most popular, and are both free and effective. While they have confusingly similar names, they are run by different people. Which one you use comes down to personal preference.

If the ads appear in popups or on every website, you may need to remove adware infecting your computer.

How to Remove Ads on Google Chrome Using AdBlock

Steps:-


1. Install AdBlock. Click this link in the Chrome browser, then click the blue +FREE to install AdBlock. A new tab should open and quickly install the extension.

    If this does not work, you can try AdBlock Plus instead using the section below. The two services are made by different people, but are almost identical apart from their business model. AdBlock is run entirely from donations, and blocks all ads by default.


2.  Click the AdBlock icon to open the controls. A new icon should appear to the right of Chrome's address bar: a red octagon with a hand in the center. Click it to access the controls described in the steps below.

    The number on the icon shows how many ads are disabled on the site you are currently viewing. You can disable this at the options by unchecking "Show on AdBlock button."

3.  Block an ad that slips through. Adblock is now automatically enabled on all pages, and should catch almost all ads. If you see an ad, or if you want to block something on a page to speed up load times, you can block it immediately by following these instructions:
  1.     Click the icon and select "Block an ad on this page" or right click the ad and select "AdBlock" → "Block this ad."
  2.     Move your mouse until the ad is highlighted in blue, then click (unless you already selected a specific ad).
  3.     Move the slider until the ad disappears. This slider appears on a pop-up window, which can be dragged around the screen if you need to see beneath it.
  4.     Click "Looks good" to permanently block that ad.

4. Change miscellaneous options. Click the icon to bring up the options menu again, then click "Options" to open a new tab. You can change several options from here. Some are self-explanatory, while the more complex options are described below:
  1.     To support specific YouTube channels, enable the YouTube whitelist option, visit any video on that YouTube channel, click the AdBlock icon, and select "Whitelist."
  2.     Check "advanced options" for a list of features that are not fully functional, such as bypassing Hulu.com ad-blocking detection, and synching your settings to other computers with Dropbox.

5.  Add more filter lists. If many ads are getting through, you probably need to update your filters, or list of ads that AdBlock uses to identify what to block. Click the icon and select "Options," then click "Filter Lists" at the top of the screen. You can click "update now" to use the recommended filters, or check additional filter lists for "above and beyond" blocking.
  1.     Extra filters include "Antisocial" to block social media buttons, "Fanboy's Annoyances" to block social media buttons, in-page popups, and other non-ad "clutter," and others.[3] Look up a description of the filter list before you use it, as it may block something you use or (slightly) slow down your browsing.
  2.     The "Customize" link at the top of the screen lets you add your own filters yourself. Do not do this before reading the instructions in the section on filters, or the adblock plus tutorial (which uses the same syntax).

6. Enable ads. Click the icon and select "Pause AdBlock" to turn the extension off until you click the icon again. To permanently enable ads on a site you regularly visit, instead select "Don't run on this page" (for a specific URL) or "Don't run on pages in this domain" (for all web pages on the same site). 

Friday, 21 July 2017

How to Force Internet Explorer to Always Use Google Chrome

This article describes how you can force Internet Explorer browser to always render all web pages in Google Chrome even if the site doesn’t carry the Chrome meta tag.


You love Google Chrome more than Internet Explorer but since you work in a corporate environment, you aren’t allowed to install Google’s browser on your office computer.

How do you use Chrome then?

Well, you have two options. You can either use the portable version of Chrome (it doesn’t require installation) or you may download the Chrome Frame plugin that, in simple English, will let you run Google Chrome inside Internet Explorer itself.

The Google Chrome Frame plugin is available for all versions of Windows Internet Explorer (including IE 6).

ALWAYS OPEN SITES IN GOOGLE CHROME

There is a minor problem. If are want to open a website inside Internet Explorer using Google Chrome Frame, you need to manually prefix the URL with “cf:” (without quotes) to activate the Chrome engine. For example, you’ll have to type cf:http://way2trick.blogspot.com in the IE address bar to render this site using Chrome.

Since this involves some effort, here’s a simple workaround that will automatically open all websites inside the Google Chrome Frame without you having to type the “cf” prefix with every URL.

Download the chrome-frame.reg file and double click it. This will add a new entry in your Windows registry forcing IE to render all web pages with Chrome.


If you like to change that behavior to the default settings,   just open your Windows Registry (start -> run -> regedit) and navigate to the following key.

HKEY_CURRENT_USER\Software\Google\ChromeFrame\OptInUrls

Now delete the registry value that says * and Chrome Frame will become invisible again unless you manually invoke it with cf command.

How to Add Websites as Apps in Google Chrome

The default start page of Google Chrome, that you see when you create a new tab, has two sections.  The “most visited” section contains thumbnails of websites that you visit more often while the other section has shortcuts to web apps that you have installed from the Chrome Web Store.

The “most visited” list is auto-generated based on your browsing history but you can quickly add any of your favorite website to the “apps” section even if that site is not officially available as an installable app in the Chrome Store.

There are two ways of doing this. You can either drag a website thumbnails from the “Most Visited” section to the “Apps” section of Chrome and make that site available as an app. Or you may open a site in a separate tab and drag the site’s favicon to the Apps section.


OR Click on Chrome's menu button, go to the Tools menu and click on “Create app for this website.” That's it! Now you should see that website in the Chrome App Launcher. If you're using Chrome OS, this can be a really convenient way to access all of your favorite and/or frequently visited websites.

Once the website is available as an app inside Chrome, you can quickly launch the site from the Apps section itself without installing any extensions. The only limitation is that Chrome won’t generate any thumbnail images for these self-created apps.

Saturday, 8 July 2017

How to Capture Screenshots in Google Chrome without using Extensions

Good Evening Friends., There are umpteen ways to capture screenshots of web pages in your Google Chrome browser. You can use the good-old Print Screen key (or Cmd+Shift+4 on a Mac), get a snapshot utility like SnagIt or the Windows Snipping Tool, or even better, get a dedicated Google Chrome extension like Smartshot that lets you capture the screen and annotate it.

What some may not know is that the newer versions of Google Chrome have a built-in screenshot capabilities allowing to perform screen captures without install any extensions. The more interesting part is that you can even add device frames to your captured images for more realistic mobile screenshots.

How to Screen Capture in Google Chrome


To get started, open any web page inside Google Chrome and choose Settings -> Tools -> Developer Tools. Alternatively, press F12 on Windows or Cmd+Opt+I on a Mac to directly open the Chrome Dev Tools window.

How to Capture Screenshots in Google Chrome without using Extensions


Next, toggle the Device Toolbar button so that it turns blue. Now select any mobile device from the built-in list of device presets. Set the zoom to 100% and click the Rotate icon to change the orientation (default is portrait mode).

The stage is set. Click the 3-dot menu in the right and enable device frame. Next, choose Capture Screenshot from the same menu to save a device screenshot in PNG format.

Capture Screenshots in Firefox


You can capture screenshots of web pages in Firefox as well without installing any add-ons. Unlike Chrome which can only capture visible region, Firefox developer tools can take a snapshot of the entire web page and automatically saves it in your default downloads folder.

Open Web Developer tools inside Firefox and, under Settings, enable the option – Take a screenshot of the entire page. Firefox will add a camera icon to the developer toolbar letting you capture screenshots with one-click.

Wednesday, 21 June 2017

Save Web Pages as PDFs Without Installing Extensions

While there are plenty of PDF writing software and online conversion services around that can help you save web pages as PDF files, the fact is that you don’t need any of them as long as you have Google Chrome on your computer.

Open any web page inside Google Chrome, press Ctrl+P (or Cmd+P if you are on a Mac) to open the Print dialog and change the destination printer to “Save as PDF.” Hit the Print button and the current web page will instantly download as a PDF document. Simple!


You neither have to install any software on your computer nor any extensions in your browser because Google Chrome itself acts as the PDF writer.

This is especially useful for downloading PDF copies of web pages that involve transactions or session data – like the checkout page on a shopping website – because you often cannot pass such pages to any online PDF conversion service.


One more thing. You can also use Chrome’s PDF engine to convert your local image files, text files and any local HTML web pages to PDFs – if you an open a file in Chrome, it can convert the file to PDF.

Monday, 12 June 2017

Turn On Click-to-Play and Make your Google Chrome More Stable

You are watching a video in Google Chrome and suddenly a yellow notification bar pops-up saying that the Shockwave Flash plug-in isn’t responding. While Chrome may have come a long way, these frequent Flash Player crashes still remain the most annoying thing about Google’s browser.


FIXING SHOCKWAVE FLASH CRASHES IN CHROME

The easiest solution to the problem would be that you completely disable the Shockwave Flash plug-in inside Chrome. Go to the Chrome address bar, type chrome://plugins and find the entry that says “Adobe Flash Player /Shockwave Flash.” Click Disable.

While this certainly resolves the crashing behavior, it creates another problem.

YouTube is probably the biggest reason why we need the Flash Player in our browser and once we disable the Shockwave Flash plugin, some of the videos won’t play. YouTube does offer an HTML5 video player but videos that are enabled for advertising (most professional content on YouTube display ads) still require the Flash Player. Also, the YouTube video player served with Flash seems to offer more features.


RUN THE FLASH PLAYER ON-DEMAND INSIDE CHROME

A better alternative is that instead of completely blocking the Flash plugin, you configure Chrome such that the plugin loads only when required.


In this case, the plugin stays inactive by default but if you happen to visit a web page that requires Flash, you can load the plugin on-demand.

Go to the address bar and type chrome://settings to open the Chrome Settings windows. Choose Show Advanced Settings -> Content Settings (under Privacy) and then choose “Click to Play” under the Plug-ins group.

If a YouTube video or an audio clip on the Soundcloud requires Flash, you can click the plug-in icon to temporarily enable the Flash Player for that page. This obviously isn’t a permanent fix but just a workaround to deal with a very frustrating and common problem of Google Chrome.

Download Web Pages as PDFs with Chrome for iOS

Just like the desktop version of Chrome, you can now the Google Chrome browser on your iPad or iPhone to download web pages as PDF files without requiring a separate app. The menu options aren’t very intuitive though so here’s a quick walk-through.


PRINT WEB PAGES AS PDF'S WITH CHROME

While you are inside Google Chrome, tap the Menu button and then choose the Print option. Choose Google Cloud Print and you’ll see a list of all your Android and iOS devices that also have Chrome installed on them. Choose the Save to Google Drive option instead and a PDF version of the current web page will instantly get saved to your Google Drive.

Alternatively, you can pick any of your other Android /iOS devices under the Google Cloud Print menu and the PDF file will remotely download to that device. You’ll have to open Chrome on that other device to access the PDF file.

If the PDF printing option isn’t working on your iOS device, make sure that you are signed-in with your Google Account and that Chrome to Mobile option is enabled. This is available under Menu -> Settings -> Google Account (your email address) -> Chrome to Mobile.

One more thing. It is also possible to save web pages as PDFs directly on your iOS device, bypassing Google Drive, but you can’t export that file into other PDF reading apps like iBooks or even your Mail application.

Chrome internally uses the Quartz API of Apple to generate PDF files – the page layout is well preserved but the hyperlinks won’t work inside the PDF.

Wednesday, 7 June 2017

How to Install Extensions from outside the Chrome Web Store


Google wants your Chrome browser safe and therefore discourages users from installing any web apps and extensions that aren’t available in the official Chrome Web Store.

If someone tries to add an unapproved extension (CRX file) or a user-script (*.user.js) in Chrome, the browser will throw a yellow warning message as shown in the above screenshot.

There’s however an easy workaround to this problem.

First download the CRX file of any Chrome extension /web-app to your computer. Then click the Settings icon in Chrome (previously a Wrench icon) and go to Tools -> Extensions. Drag and drop the CRX file on this page and Chrome will gladly install the add-on.

Thursday, 1 June 2017

Error Code DNS_PROBE_FINISHED_NXDOMAIN

Two Method :- Flushing the DNS  Changing DNS settings
If you are a Google Chrome User then you might get DNS_PROBE_FINISHED_NXDOMAIN Error any time. In Most Cases Users are facing this error in Chrome Browser only, Whilst you can easily access any web page on Mozilla firefox or IE.


Error Code DNS_PROBE_FINISHED_NXDOMAIN


This error Occurs because DNS lookup Fails When you try and access the Webpage.It is also Important to Keep your Windows PC Clean and Optimized, As said times and times again, Various Errors Occurs because of Corrupt or Unorganized Registry Files and System Files.

Ok then, Today i will Share Few Methods that can help you to get rid of this Error Code DNS_PROBE_FINISHED_NXDOMAIN easily. Follow the Below Mentioned Steps and you will be good to go.

Method 1: Flushing the DNS

As This Issue Occurs because of DNS, We will first try to Flush the DNS and see if this helps, Follow these steps: 

Step 1: Press Windows Key + R to open up Run dialogue box
Step 2: Type in CMD and press enter to Open up Command Prompt
(Alternativele to to Open Command Prompt you Can Press Windows key + X and click on Command Prompt Admin)
Step 3: You will see Command prompt is now open, Now Simply Type the Below Highlighted Command as it is and press enter."netsh winsock reset catalog"

Step 4: Once the Above Command is Executed, Now Reboot your PC if you want or try to open the same web page what was showing you the error. There should not be any issue now.

Method 2: Changing DNS settings


If you are still getting the same error then you will need to do some tweaking in DNS Settings which i will show you in just a bit. First let me tell you that this requires you to Make some Changes in your DNS but these changes seems to work and helps to get rid of of Error Code DNS_PROBE_FINISHED_NXDOMAIN.

Step 1: Right Click on the Network Icon in your Taskbar, then Click on Open Network and Sharing Center.

Step 2: A Window will open up, On the left Pane, Click on Change Adapter Settings.

Step 3: Now you will see all the Network Connection but you will have to identify which is active and connected, It can be LAN or Wireless Connection. You will have to Right Click on the Active Connection and Click on Properties.

Step 4: Now another Window will Pop up there just Click on Internet Protocol Version 4 (TCP/IPv4) and then Click on Properties button under it.

Step 5: Now you will have to Check Use the Following DNS server Addresses Option Where you will input the following Values just as shown in Below Picture.

"Preferred DNS Server: 8.8.8.8 Alternate DNS Server: 8.8.4.4"


Now Click OK and try if you still get the error in Chrome.

Note: You can Uncheck Internet Protocol Version 6 (TCP/IPv6) in Step 4.
These Two Methods Works to Fix Error DNS_PROBE_FINISHED_NXDOMAIN but if you still can't get rid of it then you can try to Reinstall Google Chrome on your Computer.

Tuesday, 30 May 2017

How to Resume Failed Download | Continue failed download in browser

Good evening Friends., Google Chrome is one of the most popular web browser for Windows PC only behind Mozilla Firefox web browser. It is fast, it is easier to use, yet it lacks some basic functionalities like the ability to pause download and resume it. Here is a tutorial on how to resume failed download in Google Chrome browser.

Inability to pause and resume download in Google Chrome must be the most asked feature, but seems like Google development team is yet to give any value to users demand. On the other hand, Mozilla Firefox browser has one of the best downloading manager with pause and resume capability for downloads.

Coming back to Google Chrome, the download manager of Google chrome is not as good as the its competitors, but it also lacks basic functionalities like the ability to pause and resume downloads. Suppose if you accidently close Google Chrome while downloading in progress, by default you will not able to resume that failed download. All you can do is, restart the download from the scratch.


How to Resume Failed Download | Continue failed download in browser


Fortunately, here is a simple work around which allows you to resume failed download in Google Chrome.  To do this you need  Firefox, as we will be using Firefox download manager to resume the failed download in Google Chrome. Follow these steps to know how to do it.

Step of Resume Failed Download in Chrome :-


Step 1: Locate your failed download file in your Google Chrome folder.


Step 2: Press Ctrl + J, click on Open downloads folders.

Step 3: Find your download failed file. It should be with CRDOWNLOAD extension.

Example : faileddownload.CRDOWNLOAD
Step 4: Keep that folder open we will come back there.

Step 5: Now copy the failed download link from download page in Chrome.

How to Resume Failed Download | Continue failed download in browser


Step 6: Now open Firefox and paste the copied download link in the address bar.

Step 7: When the download begins, right click on it and pause the download.

Step 8:  Right click on Paused download and select open containing folder.

Step 9: Find your paused download file, copy name of your file including the extension (.part).

Example : If your file name is pauseddownload.part then copy full pasueddownlaod.part (name only).

Step 10: Now go to the chrome download folder (see step 3).

Step 11: Change or Rename filename failddownlaod.CRDOWNLOAD to
 pauseddownlaod.part.

Step 12: If you see any corrupt message go ahead with it as it is normal whenever you change file name.

Step 13: Once you have renamed the file, copy the renamed file from Google Chrome download folder.

Step 14: Go to your Firefox download folder, delete pausedownload.part and paste your copied file there.

Step 15: Now in Firefox find your paused download, right click on it and select resume.

If you have done everything correctly then your failed download in Google chrome will resume in Firefox now. Wait until the download completes and there you have your file.

This method may not be the easiest way, but currently this is the only method through which you could resume failed download. From next time onwards don’t let Google Chrome to handle your downloads untill it gets download resume feature. 


Google Starts Filtering Chrome Extensions

In an attempt to make internet browsing experience faster, Google Chrome team has announced the removal of extensions that are multi-purpose and hinder the functionality of Google Chrome. In simple words, Google has banned all the external toolbars and search externsions that take a portion of UI of the web browser.

Google Starts Filtering Chrome Extensions


Also, there is an incoming update which will prevent the installation of  3rd party extensions, it has caused outrage in users who use privacy protection and script blocking addons.

This step is quiet absurd because on the other hand Google promotes their Toolbar for other web-browsers bundled with Adobe Flash player. It is kind of like Government censorship where they ban whole website because of a single URL. While, its true that not allowing 3rd party addons will speed up Chrome/browsing experience but Google should not dictate users what do they want with their web browser.

Mozilla Firefox, the 3rd most used web browser offers versatility and many options for customization. If things keep going like this, users may find Firefox a better alternative for  Chrome.

Saturday, 27 May 2017

How to Remove Password from PDF Files | PDF password remove

Good Noon Friends, Mostly we are received a PDF file from bank, office or other sector. We archive these PDFs into Google Drive but, because these files are protected with a password and its very difficult to remember all documents password. So here is a way to  Remove Password from PDF Files in these simple steps.


Removing Password from a PDF File


Google Drive is already protected with 2 layers of security – password and 2-factor authentication – it should be OK if we remove the password protection from PDF files before uploading them to Drive.

There is a software program available that can remove password protection from PDF files is already installed on your computer. It’s called Google Chrome.

Google Chrome has a built-in PDF reader and a PDF writer and we can combine the two features to remove the password from any PDF document. OK here is the process:

Steps:-

  1. Drag any password protected PDF file into your Google Chrome browser.
  2. Google Chrome will now prompt you to enter the password of the file. Enter the password and hit Enter to open the file.
  3. Now go to the File menu in Google Chrome and choose Print (or press Ctrl+P on Windows or Cmd+P on Mac). Choose the destination printer as “Save as PDF” and click the Save button.

Google Chrome will now save the PDF to your desktop but without the password protection. If you re-open this PDF in Chrome, it would no longer require a password to open. Thank you Ivan Sunga for the tip.


Alternatively, if you have enabled Google Cloud Print, you can choose the destination as “Save to Google Drive” in the print dialog and the unprotected version of the PDF will be sent straight to your Google Drive from Chrome.

Open the special page chrome://plugins and enable the option that says “Chrome PDF Viewer” to let Chrome natively handle PDF files.
 

Remove PDF Passwords without Chrome


If you are not a Google Chrome user, download this free Windows utility called BeCyPDFMetaEdit to remove passwords from PDF files.

Steps:-

  • First launch the program and it will ask your for the location of the PDF file
  • Before you select and open the PDF, change the mode to “Complete Rewrite,” 
  • Then switch to the Security tab and set the “Security System” to “No encryption.” 
  • Click the Save button and your PDF will no longer require a password to open.

Sunday, 21 May 2017

A Better Way to Share Web Pages by Email

When you include an hyperlink in your email message, the recipients will have no idea where that link is pointing to unless they actually click on it.

Clip Better offers a better approach that your email recipients will appreciate as well since it removes the guess work.

Use the Clip button to create a visual preview of the current page.


STOP EMAILING URLS, EMBED LINK PREVIEWS

Instead of putting raw URLs in your email messages that don’t convey anything, you can use Clip Better to effortlessly create a visual snippet of the page and send it through Gmail or any other mail client that supports HTML Mail.

The tool, possibly using Open Graph tags, will extract the page title, meta description and a thumbnail image and then puts everything into the clipboard as a neatly-formatting block which you can paste into your mail program or even your word processor.

Clip Better is available as a Google Chrome extension, as a bookmarklet and also an iPhone app. Alternatively, if you are on an unsupported platform, you can email one or more links to clipme@clipbetter.com and the service will send you the corresponding previews in rich text.

The tool is useful though it does insert some of its own branding in the link previews. You can however select and delete the branding easily if you wish to.

Available at clipbetter.com.

Friday, 19 May 2017

How to Force the Browser to Remember the Username and Password

The password-saving feature is available in all modern browsers but some websites, maybe for security reasons, disable this option for their login forms. For instance, the PayPal website doesn’t allow the browser to remember your password and thus you are forced to enter the password every time you open PayPal. Some banks websites do that as well.

Use the Remember Password extension for Chrome and it will force the browser to remember passwords even if the site has disabled the option.


HOW WEBSITES DISABLE PASSWORD SAVING

Websites can easily disable the auto-fill option for login forms by setting autocomplete=off for the password field. For instance, if the login form is written as below, the browser will never prompt the user to save the password field because form autocompletion is turned off.

<form>
 <input type="text" name="username">
 <input type="password" name="password" autocomplete="off">
</form>

FORCE THE BROWSER TO REMEMBER PASSWORD

Now that you know how websites turn off the option to remember passwords, getting around this problem is simple.

You can set the autocomplete attribute of the password fields on a web page to on (if they are off) and you’ll be able to save passwords. Here’s a piece of JavaScript that will automatically turn on autocomplete for all password fields on a web page.

 var fields = document.querySelectorAll('input[type="password"]');
  for (var i = 0; i < fields.length; i++) {
    fields[i].autocomplete="on";   
  }

No, you don’t have to worry about the code as there’s a simple extension for Chrome – Remember Password – that does it automatically for you.

Install the Remember Password extension and then open a site like PayPal that does not allow you to save passwords. Login with your username & password and the browser will now prompt you to remember the password.

Wednesday, 17 May 2017

Must-have Extensions for Google Chrome


Must-have Chrome extensions and apps that will improve your Google Chrome browser experience.

Create notes, to-do lists, voice memos and photo notes with searchable text.

Send and receive SMS text messages from your desktop computer.

Send web pages to your Kindle for reading later in a clutter free environment.

Send web links, text notes and even push files from computer to your phone.

Power users can browse the web using keyboard shortcuts. No mouse required.

Share links to multiple social websites with a go.

Don't send raw links over email, send previews that suggest what a link is all about.

A YouTube music play for Chrome that also includes a radio.

Easily extract CSS and HTML from a web page and send it to CodePen or jsFiddle.

Copy text from any image with a right-click. It's like an OCR for Chrome.

Read an article simply by hovering over a link.

Easily click links on web pages or type text in input boxes.

Improved bookmarks manager for Chrome with website thumbnails and instant search.

Convert web pages and documents to EPUB ebooks that you can read offline on your Kindle or iPad.

Get notified when new videos are available in your YouTube subscriptions list.

You can write an email in Gmail now and schedule it to be sent automatically at the perfect time.

Unblock websites and access content, including videos, that aren't available in your country.

Improves your YouTube experience and hides all the annoying parts.

A well designed Markdown text editor for Chrome.

A minimal text editor for Chrome that also sync with Dropbox and Google Drive.

Preview and test any of the Google Web fonts on your website.

Select some text on a web page and the add-on will read it for you.

Access other computers or allow another user to access your computer securely over the Internet.

Easily manage your installed extensions, applications and themes from the Chrome toolbar.

Lets you restrict the amount of time you spend on time-wasting websites.

A mini RSS reader that sites in the toolbar of your Chrome.

Runs in the background and monitor web pages for changes.

Make your Chrome run faster by suspending tabs and restore them all with a click.

Screen capture anything you see on the web with a click.

Focus on your work and avoid the distracting websites.

This is the easiest way to save a YouTub video as a GIF file.

Print web pages without the clutter or save them as PDFs

View the source code of any web page, deobfuscated and beautified.

It collects all your bookmarklets and puts them in the contextual menu.

This adds movie player like controls to animated GIFs on the web.

Delivers any web content to your Kindle or the Kindle Reading Apps.

Learn and master the various keyboard shortcuts available in Gmail.

Hover your mouse over an image to see the full-sized version in an overlay window.

Write text in your own language using virtual keyboards and transliteration.

This lets you to easily shorten links with goo.gl and generate QR codes.

Unified desktop notifications for Gmail and all your social networks.

Split Chrome in two windows. Click a link in the left window and it opens in the right one.

Identify the name of the fonts used in a web page with a click.

You can manipulate the appearance of websites and the changes are permanently preserved.

Quickly hide all the open tabs and replace them with a work related website.

Read long web pages like a novel in a clutter-free environment.

View camera details, GPS location and other information about any photograph.

See all your open tabs and Chrome windows in a vertical hierarchical tree.

Subscribe to RSS feeds in your favorite news reader with a click.

The add-on will auto-expand all short URLs found on a web page.

Browse the web in black and white in pure text without images and other media.

It makes the Twitter website clean and more readable.

A better history viewer for your Chrome.

Related Posts Plugin for WordPress, Blogger...

Labels

404 AdBlock Add-on Airtel GPRS Trick Airtel SMS Trick Alexa Amazon Amazon Kindle Amazon Prime Android Android 8 Android Oreo antivirus Apple Apple Mac ASCII Audacity Audio Authotkey Backup Balance Transfer in Vodafone Battery Bing Blogger Blogging Bookmarklet Browser Camera Chromebook clock Cloud colors command lines Computer Computer Tricks configuration Contact Creative Commons Credit Card CSS devolop DIY Doodle DOS Download Dropbox E-Mail eBook Email Email Attachment Embed Encryption English Error Evernote Eyes Facebook Facebook Tricks Feedburner Flipkart Font Foursquare Free Internet Free sms trick in Vodafone G Mail Gadget Game Getty Images GIF Gists Github Google Google AdSense Google Analytics Google Apps Google Chrome Google Contacts Google Currents Google DNS Google Docs Google Drive Google Earth Google Font Google Forms Google Images Google Map Google Photos Google Play Store Google Plus Google Print Google Reader Google Script Google Sheets Google Spreadsheet Google Translate GPRS Setting GPS Hacking Health App HelloFax Hindi Hoodie HTML Icons idea Image Editing Images IMEI Indian Railways Infographics Instagram Internet Internet Explorer Internet Tricks iOS iPad iPhone IRCTC iTunes iTV JavaScript JioCinema JioTV Junglee Kindle Language Translation Laptop Laptop. TV Life Time FREE GPRS Life-Style Link Linkedln Linux logo Make Money Online Microdoft Powerpoint Microdoft Word Microsoft Office Microsoft Outlook Mobile Mosaic Music Name Networking nexus Notepad OCR Online Shopping Open DNS OS Outlook Password PDF Petya Phillips Hue Lights Photogtraphy Pixel Play Station Podcasts Pokemon Pokemon Go Polls Print Productivity Proxy Server Pushbullet QR Code Ransomware Reddit Reliance Hack GPRS Reliance Jio RGB Ringtone Router RSS Safe Mode Samsung Galaxy S Scrabble Screen Capture Screen Sharing Screencast Secrets Security Send free sms from PC SEO Sierra Skype Slideshare SMBv1 SMS Snapchat Snapdeal Social Media Solution Sound Device Speech Recognition Sql Steam Sync Synology NAS Tata Docomo GPRS trick Teleprompter Torrent Trick Tricks TV Twitter UltraISO Unicode Unknown Extension Unlimited 2GB Unlimited 3GB Unlimited GPRS USB USB Security Key Video Editing virtual desktop Virus attack VLC Vodafone 110% working trick for GPRS Vodafone 3g Vodafone GPRS VPN wallpapers WannaCry Web Design Web Domain Website Wget Whatsapp WiFi Wikipedia Windows Windows 10 Windows 10 S Windows KN Windows Tricks windows updates Winows N Wolfarm Alpha WordPress XBox YouTube Zip
Twitter Delicious Facebook Digg Stumbleupon Favorites More