Google has been doing its part to make sure everyone has a backup of important data, and it recently released a new tool for Windows and Mac users to take that redundancy to the next level. Appropriately named Backup and Sync, it’s a quick and effective tool to store your important files in the cloud.
Backup & Sync Replaces Google Drive and Google Photos Uploader
Before we get into it, let’s first talk a little bit about what Backup and Sync actually is. If you’re a heavy Google user, you’re probably already aware of Google’s other sync tools: Google Drive and Google Photos Uploader. Those have both now been rolled into Backup and Sync, so you can control all of your files, videos, images, and more from one app. This is where you’ll control which folders from your Drive are synced to and from your PC or Mac, as well as specifying which image folders should get backed up to your Photos library.
Google Drive is really the core of the Backup and Sync tool, so if you never used the Drive app then a bit of explanation may be in order. Essentially, this new tool will allow you to sync your Google Drive cloud storage with your computer—be that the entire Drive or just specific files and folders. These are then treated as local files on the computer, so your important stuff is always up to date on every computer you own (and in the cloud).
The only exception here are Google Docs files (Sheets, Docs, Slides)—those are still online-only, as Backup and Sync will not download them for offline access. It will, however, put icons in the Google Drive folder so you can double-click them as if they were normal documents (you’ll just need an internet connection to view and edit them.)
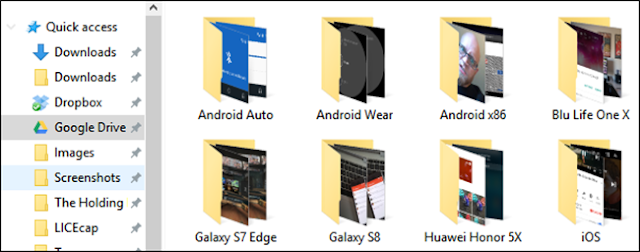
Backup and Sync also adds one more tool to the equation: the option to back up specific folders from your PC or Mac to your Google Drive. For example, I use Google Drive to store almost everything, so it’s accessible from all of my other device. But the screenshots folder on my Windows machine isn’t in my Drive folder—it’s in my PC’s Pictures folder. With Backup and Sync, I can then access folder on any of my other devices, any time.
Sound awesome? It is. Here’s how to set it up and get everything synced.
Step One: Download and Install Backup and Sync
Naturally, the first thing you’ll need to do is actually download the Backup and Sync tool. Make sure to grab the appropriate download for your device (Mac or PC). If you already have Google Drive installed, don’t worry—this tool will automatically replace it, no uninstallation necessary.
It should download pretty quickly, and you’ll just need to launch the installer when it’s finished. If you’re using Google Chrome (as you should be), just click the download button at the bottom of the page.
A few seconds later, Backup and Sync will be installed. When it was finished, mine told me to restart my computer for reasons unknown to me—I didn’t do it, and everything still worked fine. Take that, Google.
If you previously had the Google Drive app installed, Backup and Sync should automatically log in to your Google Account. If not, you’ll need to log in. After that, a quick splash screen will let you know what the app is all about: backing up your stuff. Click “Got it” to move into the app.
Step Two: Choose Which Folders Will Get Synced from Google Drive
The Backup and Sync tool is split up into two main sections:
* Google Drive: This performs the same function as the original Google Drive app. You choose what folders to sync from your Google Drive cloud storage, and they’ll appear in a Google Drive folder on your PC. Anything you put into that folder will also sync to Google Drive.
* My Computer: This part is new, and allows you to sync files between your computer and Drive without putting them in the dedicated Google Drive folder. Just pick the folders from your computer you want to sync, and they’ll sync to your cloud storage (though they’ll appear in a separate section of the Google Drive interface, rather than with all your other Drive files.)
Let’s start with the Google Drive section first—it’s second in the list, but it’s much simpler and will be familiar to anyone who’s used Google Drive in the past.
You have a few specific options in this menu. You can:
* Sync My Drive to this Computer: Use this option to enable/disable syncing your Google Drive to your computer.
* Sync Everything in my Drive: Literally syncs the entire contents of your Google Drive to your computer.
* Sync Only These Folders: Allows you to specify which folders to sync from Drive to your computer.
These are really straightforward—just choose what you’d like to sync and be done with it.
Step Three: Choose Other Folders On You PC to Sync
Next, let’s look at the My Computer section, where you can select other folders on your PC to sync. There are a few options already available here: Desktop, Documents, and Pictures. You can simply tick the box next to the option to completely back up everything from that location to your Google Drive. Simple.
But if you’d like to get a little more granular and only back up a certain folder, you can do this by clicking the “Choose Folder” option. Just navigate to the folder you’d like to back up, and click “Select Folder.” That’s all there is to it.
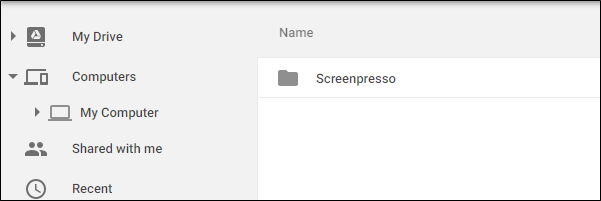
NOTE: Files you sync from outsdie your Drive folder won’t show up in Drive alongside all your other files. To access those files, head to Google Drive on the web and click on “My Computers” in the left menu. This option is also available in the Drive mobile apps.
If you want a file or folder to show up under “My Drive”, you’ll need to sync it the old-fashioned way: by putting it inside the Google Drive folder on your PC.
Step Four: Tweak Your Photo Uploading Settings
Below the folder options in the “My Computer” section, you can also specify how you’d like to back up images (if you choose to back up images from your PC, of course): Original Quality, which will take up space in your Drive, or High Quality, which won’t take up any space in your Drive. The latter uses intelligent compression algorithms to shrink the size of the image without reducing quality, the same as it does in the Google Photos app on Android and iOS devices.
You can also specify how you’d like to control delete options: Remove Items Everywhere, Don’t Remove Items Everywhere, or Ask Me Before Removing Items Everywhere. The last option is set as the default, which really makes the most sense anyway. Feel free to change this according to your specific needs.
Lastly, you can tick the box in the Google Photos section to automatically scan your computer for new pictures and upload them to Google Photos. There’s also a small option at the bottom labeled “USB Devices & SD Cards,” which you can use to automatically upload files from your digital camera or USB drives if you’d like. Just plug in the drive or card and specify what you’d like to do with it.
A Few Additional Notes about Backup and Sync
That’s really all there is to Backup and Sync, but there are a couple of other things worth mentioning:
* You can rename your computer by clicking on the “My Computer” (or similar) text at the top of the “My Computer” page and giving it a specific name.
* You can easily upgrade your Drive storage or disconnect your account from the “Settings” tab.
* System startup rules, file sync icon, and right click settings can also be modified on the Settings tab.
* Backup and Sync’s network activity can be restricted in the “Network Settings” section of the Settings tab. Proxies can be specific, and download/upload rates capped if need be.
* The Backup and Sync tool will live in your computer’s system tray as long as it’s running. To access its settings, just click its icon in the tray, click the three-dot menu in the upper right corner, and choose “Preferences.”
That’s pretty much it, really. It’s a simple tool.
Thanks for landing on this post, If you like my post then give your opinion and feedback in comment box.
TAGS:- #How to Sync Your Desktop PC with Google Drive and Google Photos, #spotify not syncing local files, #How to Sync Your Desktop PC with Google Drive, #how to sync your desktop with dropbox, #how to sync your desktop with onedrive, #how to sync your local file with dropbox, #how to sync your local file with google drive, #How to Sync Your PC with Google Drive and Google Photos, #local files sync to spotify, Local Files Syncing, Desktop Files Syncing, #Your Desktop PC with Google Drive and Google Photos


 08:00
08:00
 Unknown


0 comments:
Post a Comment