Monday, 31 July 2017

How to Show Emergency Medical Information on Your iPhone

How to Show Emergency Medical Information on Your iPhone

There’s a good chance you’ll have your phone with you in a medical emergency. That’s why Apple allows you to set a Medical ID that shows your medical conditions, drug allergies, emergency contacts, and organ donor status that anyone can see without unlocking your phone.

This Is No Substitute For a Medical Alert Bracelet

This feature is a great idea, but it’s probably a bad idea to depend on it if there’s crucial information you need paramedics, doctors, or other medical professionals to see in an emergency.

First of all, not everyone knows about this feature, so a doctor or paramedic may not think to check your iPhone for it. Second, it’s possible your phone could become damaged or the battery may die. If you need to communicate this information, it’s probably better to do it in the traditional way: By wearing a medical alert bracelet and recording more information on a card in your wallet.

But, if you’re already wearing such a bracelet—or if you just want to note down a few details, like your emergency contacts and organ donor status—you may want to record this information on your iPhone.

Note that, when you set this up, people will be able to view the medical details you provide from your lock screen without signing in. That’s the whole point! People can access this information even if you’re unconscious.

Enter Your Medical Information

This feature is part of the Health app on your iPhone. Once you enter the information in the Health app, it will become available on the lock screen.

Launch the Health app and tap the “Medical ID” icon on the bottom to get started. Tap “Create Medical ID” if you haven’t created one yet.

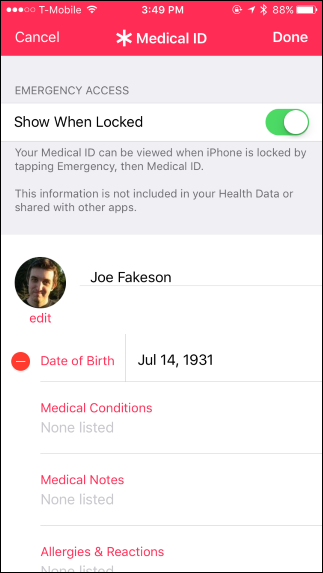
At the top of the screen, ensure “Show When Locked” is enabled. If you ever want to hide this information from your lock screen, you can disable “Show When Locked” and people won’t be able to see the information without unlocking your phone and opening the Health app.

How to Show Emergency Medical Information on Your iPhone

Enter the information you want to share in the boxes provide. Your iPhone will grab your name, photo, and birthday from your Contacts, and you can add medical conditions, notes, allergies and reactions, medications you’re taking, your blood type, whether you’re an organ donor, and your weight and height.

You can also select emergency contacts from your iPhone’s contacts and fill in their relation to you. You’ll need to actually add a person to your contacts from elsewhere on the system—via the Phone app, for example—before you can select their name and phone number as an emergency contact.

Tap “Done” when you’re finished entering information.

How to Show Emergency Medical Information on Your iPhone

You’ll see your medical ID information displayed under “Medical ID” in the Health app. You can always return to the Health app to change what you entered or add more information later, if you like. Just tap “Edit” at the bottom of the Medical ID card. If you decide you want to erase this sensitive information, you can tap “Delete Medical ID” at the bottom of this screen.

If you want to become an organ donor, Apple helps you register online through Donate Life by selecting the “Organ Donor” option and selecting “Register with Donate Life” or by tapping “Sign Up with Donate Life” on the bottom of the Medical ID screen.

How to Show Emergency Medical Information on Your iPhone

How to Find Someone’s Medical ID

If someone has made Medical ID information available on their iPhone’s lock screen, anyone with the phone can access it in a few taps.

Turn on the iPhone by pressing the Power or Home button. From the lock screen, press the Home button again to see the passcode prompt. If your iPhone just signs in immediately, it’s probably because you used a finger registered with Touch ID or because the iPhone doesn’t have a passcode enabled.

Tap “Emergency” at the bottom left corner of the Enter Passcode screen.

You will see the emergency dialer, which allows you to dial 911 or another number without unlocking the iPhone in an emergency. At the bottom left corner of this screen, tap “Medical ID”.

If someone hasn’t filled out a Medical ID card or just hasn’t made the information available from the lock screen, you won’t see a Medical ID link on the emergency dialer screen. The bottom left corner of the screen will just be empty and white instead.

Anyone who opens this screen can see the medical ID card you filled out in the Health app.

How to Show Emergency Medical Information on Your iPhone


As you can see, this feature is buried a few taps deep on your iPhone. Not everyone knows about it, so not everyone will check to see if you’ve filled out a Medical ID card on your iPhone in an emergency situation.

Remember, Apple is a company that wants to eliminate the old-fashioned wallet with features like Apple Pay and Wallet app. Medical ID is a piece of that puzzle, especially if many people begin using it. But, for now, it’s no replacement for the traditional methods of making medical information available in an emergency.

How to Enable Color Filters on Your iPhone or iPad for Easy-on-the-Eyes Reading

How to Enable Color Filters on Your iPhone or iPad for Easy-on-the-Eyes Reading

On an iPhone or iPad, you can use the “Display Accommodations” accessibility feature to invert the colors on your screen, reduce the brightness of white and bright colors on your screen, and enable color filters designed to aid people with color blindness.

This is different from the Night Shift feature, which blocks blue light for easier reading at night. It works in a similar way, however, adjusting the colors of everything on your iPhone or iPad’s screen.

How to Adjust Display Accommodations

To adjust these features, navigate to Settings > General > Accessibility > Display Accommodations. All the color-related settings are found on this screen, although the shortcut to quickly toggle them on or off is controlled elsewhere.

How to Enable Color Filters on Your iPhone or iPad for Easy-on-the-Eyes Reading

Once you’re there, here are some of the options you’ll see.

Invert Colors

The “Invert Colors” feature can make the iPhone’s display easier to read in certain situations (like at night). Enable this slider and white will become black, black will become white, green will become purple, and blue will become orange.

With this feature enabled, you’ll notice that the elements on the screen become darker as white is replaced with black, and there just seems to be more contrast. This can make the screen easier to read, especially if you’d rather look at a dark screen than a bright one.

How to Enable Color Filters on Your iPhone or iPad for Easy-on-the-Eyes Reading

Color Filters

The “Color Filters” category allows you to enable different color filters designed to people with color blindness. Tap this option and you’ll be able to choose between different color filters you might want to use.

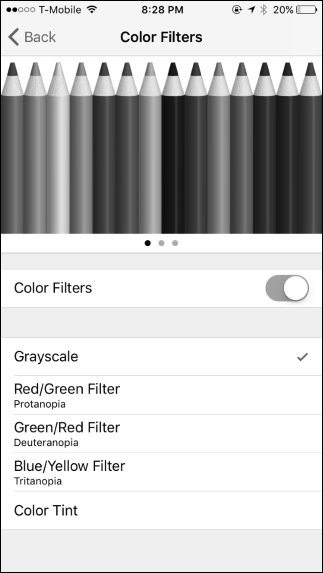
When you tap “Color Filters”, you’ll be taken to a different screen. Enable the “Color Filters” slider here and select an option to see how it looks.

The Grayscale option simple removes colors from the screen, making everything appear in black, white, and different shades of gray. The Red/Green filter is intended for people who have Protanopia, the Green/Red filter for people with Deuteranopia, and the Blue/Yellow Filter for people with Tritanopia.

There’s also a “Color Tint” option, which allows you to set a custom color hue and intensity. You can use this to tint the screen with any shade of color you like.

Swipe between the colored images at the top of the screen to see how your changes look.

How to Enable Color Filters on Your iPhone or iPad for Easy-on-the-Eyes Reading

Reduce White Point

The “Reduce White Point” option makes white elements and bright colors appear dimmer. Activate this feature and you’ll get a slider which can “reduce the intensity of bright colors”, and you can adjust it to your liking.

With this feature enabled, whites and other bright colors will appear dimmer. You’re telling your device to display darker shades of these colors. This can make it easier for people who have trouble viewing bright colors on the screen.

This is similar to, but different from, from simply reducing your iPhone or iPad’s brightness. In fact, you can adjust both the Reduce White Point slider and the screen brightness slider separately.

The below screenshot is just an approximation of what this looks like on the screen, but it isn’t far off.

How to Enable Color Filters on Your iPhone or iPad for Easy-on-the-Eyes Reading

How to Quickly Toggle These Options

If you only want to use one of these features sometimes, it can be tedious heading back to the Settings app and toggling the slider off and off. Your iPhone or iPad contains an option that allows you to toggle your preferred color setting on or off by triple-clicking the Home button. This triple-click shortcut can also be used for Guided Access and other accessibility features.

To find this option, head to Settings > General > Accessibility > Accessibility Shortcut. Select one or more of the “Invert Colors”, “Color Filters”, or “Reduce White Point” options here.

When you triple-click the Home button, you’ll either see a menu of options (if you check multiple options here) or the action you selected will immediately take effect (if you only select one option here).

How to Enable Color Filters on Your iPhone or iPad for Easy-on-the-Eyes Reading

If the “Guided Access” option appears grayed out in the list here and you want to remove it from the menu, head to Settings > General > Accessibility > Guided Access and disable the Guided Access feature.

How to Hide a Facebook Post (Without Deleting It)

How to Hide a Facebook Post (Without Deleting It)

Facebook has a lot of uses. For some, it’s just a social network, but for others, it’s a piece of professional branding. If you’re in the latter category, it helps to keep your Timeline tidy and free of irrelevant information.

While it’s simple delete a Facebook post, this isn’t always the best solution. If, for example, you change your profile picture, you can’t just delete the post. If you deleted the photo, it would be removed from Facebook so couldn’t be your profile picture. Instead, you need to hide it from your Timeline.

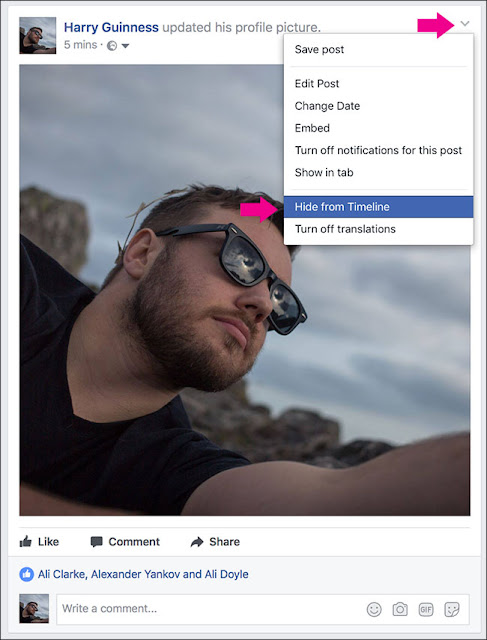
To hide a post from your Timeline, click or tap the downward facing arrow next to it and select the Hide from Timeline.

Click or tap Hide and the post will be hidden from your Timeline. It’ll still appear elsewhere on Facebook, just not on your profile’s Timeline. If people have already shared the post, it will remain on their Timelines.

How to Hide a Facebook Post (Without Deleting It)

To unhide a post, click or tap Activity Log. It’s just under your cover photo.

How to Hide a Facebook Post (Without Deleting It)On mobile, tap the arrow next to the post and select Show on Timeline.


On the web, click the crossed out circle and then select Allowed on Timeline.

How to Hide a Facebook Post (Without Deleting It)

Sunday, 30 July 2017

Four Tools That Automatically Download Stunning Wallpapers Every Day

Four Tools That Automatically Download Stunning Wallpapers Every Day

The Internet can be a horrible place, but there’s a lot of beauty out there. Beautiful paintings and photos can remind you of that, and the right program can deliver them to you automatically.

Whether you love classic art or photos of contemporary architecture, there’s a program with custom wallpaper out there for you. Here are a few of the best tools for the job we’ve found, and how to use them.

Artpip: Classic Paintings Every Day

Whether you’re an art history buff or just wish you knew more, Artpip provides you with classic paintings on your Windows or Mac desktop.


Just install the application and your basically done: your wallpaper will now change to a random painting once a day. You’ll get a notification, telling you the painting’s name, artist, and year. If you’d like some control over which era of painting you see, or how often you’d like to see them, head to the settings panel.

From here you can choose a time period. For $10 more you can add some collections of photos to the mix, and rotate the images faster than one picture a day—other than that, the program is completely free.

Splashy: A Constant Stream of Stunning Free Photos

Unsplash offers a massive collection of photos that’s totally free, even for commercial use. It stands out in terms of quality: these photos are, almost without exception, stunning. Splashy is a free program for macOS and Windows that grabs pictures from Unsplash and puts them on your desktop.


By default, only featured images are shown, but you can choose photos from a specific category if you prefer: buildings, food, nature, objects, people, and technology are all offered. Everything is free, and if you really love a photo you can

Desktoppr: A Dropbox-Syncable Database of Wallpapers

Not sure you want a dedicated app just to find cool wallpapers? Desktoppr is an online database of wallpapers you can set to sync with Dropbox. Just sign up for an account, then start browsing the database.


Click the cloud button by any image to send it to your Dropbox folder. Then all you need to do is set your computer to use that folder for its wallpaper. It’s a simple process that doesn’t require installing any software, and it will only ever show images you’ve specifically chosen.

In addition, whenever you add an image to that folder on your computer, it’ll get uploaded to the Desktoppr database. The database is getting updated all the time with new wallpapers from users, so check back regularly!

John’s Wallpaper Switcher: RSS, Image Search, Facebook, and More


If you want way more flexibility than any of the above tools, check out John’s Wallpaper Switcher, which can customize your wallpaper with image search, RSS feeds, and more. You can choose multiple sources to rotate between, making this an extremely flexible tool for whatever images you want. The tool works on Windows and macOS computers, though only the Windows version is free.

Wednesday, 26 July 2017

What’s the Best Antivirus for Windows 10? (Is Windows Defender Good Enough?

What’s the Best Antivirus for Windows 10? (Is Windows Defender Good Enough?

Windows 10 won’t hassle you to install an antivirus like Windows 7 did. Since Windows 8, Windows now includes a built-in antivirus called Windows Defender (which used to be available separately as Microsoft Security Essentials). But is it really the best for protecting your PC–or even just good enough?

Run Malwarebytes Alongside Your Antivirus for Maximum Protection

What’s the Best Antivirus for Windows 10? (Is Windows Defender Good Enough?

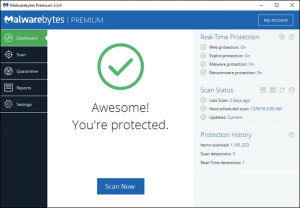
Running antivirus is still very important, but these days the really active threats are from spyware, adware, crapware, and the worst of all: ransomware. That’s where Malwarebytes comes in.

Malwarebytes not only protects your computer from malware, but does a better job of cleaning up an infected computer than anything else on the market. And it doesn’t just work on PCs — they have a Mac version too.

And to protect your browser against zero-day exploits, Malwarebytes also includes Anti-Exploit and Anti-Ransomware features, which can stop drive-by attacks cold. And best of all, you can run Malwarebytes alongside your existing antivirus to keep yourself fully protected.

A One-Two Punch: Antivirus and Anti-Malware

Here’s the short version: you need antivirus software on your computer, no matter how “carefully” you browse. Being smart isn’t enough to protect you from threats, and security software can help act as another line of defense.

However, antivirus itself is no longer adequate security on its own. We recommend you use a good antivirus program and a good anti-malware program. Together, they will protect you from most of the biggest threats on the internet today: viruses, spyware, ransomware, and even potentially unwanted programs (PUPs)—among many others.

So which ones should you use, and do you need to pay money for them? Let’s start with the first part of that combo: antivirus.

Is Windows Defender Good Enough?

What’s the Best Antivirus for Windows 10? (Is Windows Defender Good Enough?


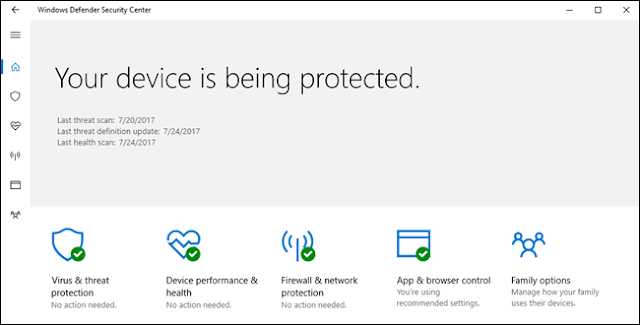
When you install Windows 10, you’ll have an antivirus program already running. Windows Defender comes built-in to Windows 10, and automatically scans programs you open, downloads new definitions from Windows Update, and provides an interface you can use for in-depth scans. Best of all, it doesn’t slow down your system, and mostly stays out of your way—which we can’t say about most other antivirus programs.

For a short while, Microsoft’s antivirus fell behind the others when it came to comparative antivirus software tests—way behind. 

So in short, yes: Windows Defender is good enough (as long as you couple it with a good anti-malware program, as we mentioned above—more on that in a minute).

But Is Windows Defender the Best Antivirus? What About Other Programs?

If you look at that antivirus comparison we linked to above, you’ll notice that Windows Defender, while good, does not get the highest ranks in terms of raw protection scores. So why not use something else?

First, let’s look at those scores. AV-TEST found that it still caught 99.9% of the “widespread and prevalent malware” in April 2017, along with 98.8% percent of the zero-day attacks. Avira, one of AV-TEST’s top rated antivirus programs, has the exact same scores for April—but slightly higher scores in past months, so its overall rating is (for some reason) much higher. But Windows Defender isn’t nearly as crippled as AV-TEST’s 4.5-out-of-6 rating would have you believe.

Furthermore, security is about more than raw protection scores. Other antivirus programs may occasionally do a bit better in monthly tests, but they also come with a lot of bloat, like browser extensions that actually make you less safe, registry cleaners that are terrible and unnecesary, loads of unsafe junkware, and even the ability to track your browsing habits so they can make money. Furthermore, the way they hook themselves into your browser and operating system often causes more problems than it solves. Something that protects you against viruses but opens you up to other vectors of attack is not good security.

What’s the Best Antivirus for Windows 10? (Is Windows Defender Good Enough?

Windows Defender does not do any of these things—it does one thing well, for free, and without getting in your way. Plus, Windows 10 already includes the various other protections introduced in Windows 8, like the SmartScreen filter that should prevent you from downloading and running malware, whatever antivirus you use. Chrome and Firefox, similarly, include Google’s Safe Browsing, which blocks many malware downloads.

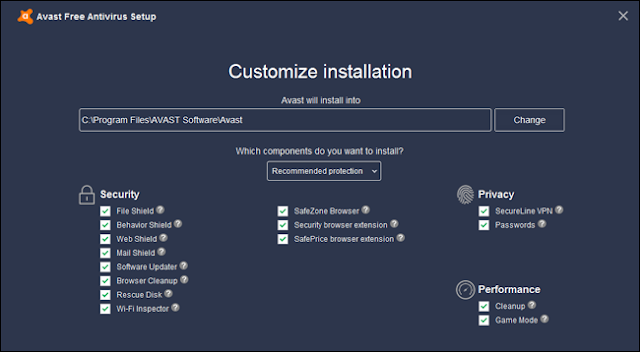
If you hate Windows Defender for some reason and want to use another antivirus, we recommend Avira. It has a free version that works well, a pro version with a few extra features, and it provides great protection scores and only has the occasional popup ad. Just be sure to uninstall the browser extension it tries to force on you.

Antivirus Isn’t Enough: Use Malwarebytes, Too

Antivirus is important, but these days, it’s almost more important that you use a good anti-exploit program to protect your web browser and plug-ins, which are the most targeted by attackers. Malwarebytes is the free program we recommend here.

Unlike traditional antivirus programs, Malwarebytes is good at finding “potentially unwanted programs” (PUPs) and other junkware. As of version 3.0, it also contains an anti-exploit feature, which aims to block common exploits in programs, even if they are zero-day attacks that have never seen before—like those nasty Flash zero-day attacks. It also contains anti-ransomware, to block extortion attacks like CryptoLocker. The latest version of Malwarebytes combines these three tools into one easy-to-use package for $40 per year.

Malwarebytes claims to be able to replace your traditional antivirus, but we disagree with this. It uses completely different strategies for protecting you: antivirus will block or quarantine harmful programs that find their way to your computer, while Malwarebytes attempts to stop harmful software from ever reaching your computer in the first place. Since it doesn’t interfere with traditional antivirus programs, we recommend you run both programs for the best protection.

Note that you can get some of Malwarebytes’ features for free, but with caveats. For example, the free version of Malwarebytes program will only scan for malware and PUPs on-demand—it won’t scan in the background like the premium version does. In addition, it doesn’t contain the anti-exploit or anti-ransomware features of the premium version—though you can get the beta version of Malwarebytes Anti-Exploit for free, if you’re willing to deal with a few bugs.

You can only get all three features in the full $40 version of Malwarebytes, which we recommend. But if you’re willing to forego anti-ransomware and always-on malware scanning, the free versions of Malwarebytes and Anti-Exploit are better than nothing, and you should definitely use them.

There you have it: with a combination of a good antivirus program, Malwarebytes, and some common sense, you’ll be pretty well protected. Just remember that antivirus is only one of the standard computer security practices you should be following. Good digital hygenie isn’t a replacement for antivirus, but it is essential to making sure your antivirus can do its job.

How to Download All Images on a Web Page at Once

Five Methods: Installing DownThemAll  Downloading All Items on a Page  Downloading Items Linked From A Page  Downloading Items Linked From with Syiwe  Downloading All Items with Saveallimages

Ever come to a web page with tons of pictures that you would like to reference,  but don't want to individually download each one?

How to Download All Images on a Web Page at Once

This article will show you how to download all the images on a page at the same time using the Firefox add-on DownThemAll and "Syiwe", a web app that allows save all images from a URL into your Google Drive private Folder.

# Method 1 of 5: Installing DownThemAll


1. Launch Firefox.  Navigate to the DownThemAll AddOn page, and click the big green+Add to Firefox button to start the process.


2. Once the file's been downloaded, you'll be prompted to install the AddOn with caution. 
Click Install, and then restart Firefox by clicking the restart button when prompted.

# Method 2 of 5: Downloading All Items on a Page


1. Navigate to a page with images. Right-click in the window, and a contextual menu will appear.
  • Select DownThemAll!... You will be shown a window with the the option to select any of the files (including images) on that page, for download. In addition to images, you can download software, compressed archives, PDFs, videos, and audio.

2. Click on the Pictures and Media button. 
It's located at the top of the page, and when clicked, will auto-select all the files that match the filter criteria below.


3. Review the selections.  Deselect any of the images you don't want to download, then click the Start button. It will save your files to the directory listed under Save Files In:
  • Note, you can even auto-rename your images in the Renaming Mask field. Simply enter a default name for the file, any renaming tags (as shown in the list below), and the extension you want the file to have. It will not convert your files to that type, however.


4. Click on "Start!".  Your images will be downloaded in the directory you specified.

# Method 3 of 5: Downloading Items Linked From A Page


1. Navigate to a page with images.  Right-click in the window, and a contextual menu will appear. Select DownThemAll from the menu.


2. Click on the Links (n) button.  This will give you a list of all the links on the page.


3. Select the desired links.  As before, select all the items you want downloaded, as well as the location you wish to save them, and any naming convention you wish to use.
  • The files will be downloaded into your selected folder as HTML files with the embedded link to the full-size image page. Double-click on the HTML page, and it will open in your default browser.


# Method 4 of 5: Downloading Items Linked From with Syiwe


1. Launch your web browser.  Navigate to the http://www.syiwe.com page, and click on the big red button to start the process.


2. Login with your Google Account credentials:


3. Allow syiwe access your google drive to save images on there:


4. After your authentication create your first gallery on button highlighted:


5. Insert the name of gallery an click in create gallery:


6. Now, you must click in button Add Photos to Gallery in right top:


7. Insert on the text field the URL of the Website that have a gallery that you want save, and click in search images:


8. You should see a list of clickable images, select images that you want send to your google drive, a click in the big red button "Save selected images on Google Drive":


9. And finally you should see all images save on your private Google Drive folder like this:

# Method 5 of 5: Downloading All Items with Saveallimages


1. Go to Save All Images


2. Paste the site's url that has images you want to download to the field


3. Click "Display all images" button to begin processing - images will be extracted and displayed as thumbnails for you to preview
(or save single image you like)

4. Green button "Save All Images" appears after the processing -
click on it to save all image as zip file to your computer.


How to Save Your Message History on WhatsApp

Five Methods:  On an Android  On an iPhone  On a Windows Phone  On a Nokia Phone  On a Blackberry

WhatsApp  is a cross-platform messaging app that allows users to communicate over Internet data or Wi-Fi without having to pay for SMS. WhatsApp provides two options for users who wish to save their chat history: creating a backup of it or exporting it as a .txt file that can be sent over email. This article will show you both methods.

How to Save Your Message History on WhatsApp

# Method 1 of 5: On an Android


1. Launch WhatsApp on your smartphone.

2. Tap "Settings" from the menu.

3. Tap "Chat Settings."

4. Tap "Backup Conversations."

5. Export your chat history.  Go to your chats screen. Tap and hold on a conversation or group conversation you would like to send. Select "Email conversation," and decide whether you'd like to send the media as well. An email will be composed with your chat history attached as a .txt file.

# Method 2 of 5: On an iPhone


1. Back up chats in iTunes or iCloud.  Whenever you Back Up Your iPhone, your WhatsApp conversations will be backed up as well.


2. Restore your chat history.  To restore your chat history, you'll need to restore the entire backup, which includes your settings and data for the rest of your phone and its apps.

3. Export your chat history.  Launch WhatsApp and go to Settings >> Email Conversation.  From the Chat History screen, select the conversation you would like to save. Decide whether you want to email the history with or without the media. Type in an email address and press Send.


# Method 3 of 5: On a Windows Phone


1. Launch WhatsApp and open the main chat screen.

2. Tap the three dots in the bottom right corner for the menu.

3. Go to Settings >> Backup.

4. Export your chat history.  Launch WhatsApp and open the conversation you wish to send. Tap the three dots in the bottom right hand corner, then go to Info >> Email Chat History.

# Method 4 of 5: On a Nokia Phone


1. Wait for automatic backup. 
You cannot backup your chats on Nokia S40 phones.  If you have a Nokia S60, your chats will backup automatically every day at 4 a.m.

2. Use manual backup.  For other Nokia phones, you can back up your chats manually. #*Go to Settings >> Chat History >> Backup Chat History.
  • Tap "Yes" to save your messages.

3. Export your chat history
  • Nokia S60: Launch WhatsApp. From the main screen, go to Options >> Settings >> Chat History >> Send Chat History. Select the chat you want to email. An email will be composed with your chat history attached as a .txt file.
  • On a Nokia S40: Launch WhatsApp and open the conversation you want to email. Tap Options >> Chat History >> Email. An email will be composed with your chat history attached as a .txt file.


# Method 5 of 5: On a Blackberry


1. Launch WhatsApp.

2. Go to Settings >> Media Settings

3. Set "Message Settings to Media Card.

4. Export your chat history. Launch WhatsApp from your smartphone and go to your chats screen.
Highlight the conversation or group conversation you would like to send. Press the BlackBerry button, then select "Email conversation."


Warnings:-

  • If you send the chat history with media attached, it will be a much larger file size and may take more time and data to send. If your phone has a message size restriction, it may truncate or fail to send your entire chat history.
  • The backup feature is only available in WhatsApp versions 2.9.2 and later. If you are running an earlier version of WhatsApp, please update to the latest version in order to make use of this feature.
  • There is no way to back up WhatsApp messages on Nokia S40 phones

How to Increase Website Traffic for Free

Many people spend a great amount of money trying to launch their website through strong advertising campaigns; however, a lack of funds shouldn't be a setback as there are many ways to get traffic without spending a dime.

How to Increase Website Traffic for Free

Steps:-

# Optimize your website to be search-engine friendly. 

1. Submit it to various search engines and directories. In addition to major search engines such as  Google, Yahoo, Ask, Bing and MSN, it's worth submitting to lesser known web directories. If your website is listed in as many places as possible, it can boost your rankings in major search engines as well.

2. Make sure your title, description head, and header html tags accurately convey the subject of your site; search engine algorithms use these as keywords to categorize your site and direct relevant traffic.

3. Spread the word about your affiliate program by submitting it to affiliate program directories and contacting the owners of related websites.

# Create a links page that will contain the links to other non-competing websites in the same industry. 

1. Contact the owners of other websites with your proposal to exchange links. You will add their link to your links page, and they will link to your website in return.

# Post in forums. 

1. Visit the online discussion forums where people in your target market like to gather. Post useful responses to people's questions, and include a link to your website at the end of your post next to your name. Although you ultimately want to get your sig file with the link to your site seen as often as possible, don't overdo it with your posts, otherwise other forumites won't respect you, and therefore won't visit your site.

# Comment on blogs.

1. Visit other people's blogs on the topic related to your website. Most blogs allow you to add comments about the issues being discussed. Add insightful comments about the blog topics, and leave your website link. Your comment and your link will permanently remain on the blog website.

# Create an e-mail "signature" - your name, your website address and a short tag-line describing the main benefit of your site.

1. Set your e-mail program to automatically add your signature to every e-mail that you send.


# Look into traffic exchanges.

1. There are many types of traffic exchanges but the idea is the same - you team up with other webmasters, and they send you traffic in exchange for you sending them traffic. Search the web for "traffic exchange" to find those services.

# Create something of value that people will pass around.

1. It can be a report with useful information that you allow people to give away. It can also be some kind of cool and unusual web-page that people will want to e-mail to all their friends. Of course, the pass-around item will include your advertisement and your link, spreading the word about your website. This is a "viral" strategy.

# Write Articles.

1. Write articles on the topic related to your website, and include a link to your site in your author bio. Submit your articles to article directories, and allow people to publish your article in their newsletters and websites. Your articles will spread around the web like wildfire. People will read them and visit your website. The best part is that people who read your articles will regard you as an expert, and they will be much more likely to buy from you when they go to your website. How's that for a free publicity?

# Use accurate keywords for your content. 

 1. The point of keywords is that they are the terms most people looking for your article by topic will search by. Check those with free Google terms and use the most popular relevant one in your title - a descriptive title to let them know right away what it is if it's a word with multiple meanings. Drawing blood for a phlebotomist is not the same thing as a comics artist drawing blood in a fight scene. Be very literal and then use the exact keywords several times in the article where they are relevant, as well as synonyms. Don't overdo it, or you look like you're trying to spam Google. Just use the keywords naturally when describing the topic.
  • If it is a confusing keyword phrase like Drawing Blood, link to the other meaning and mention that in the first paragraph. "This article is about drawing blood in graphic novels. Phlebotomy is drawing blood for medical tests or donations - here's the other page on "Drawing Blood." Then link to the phlebotomy page in that. By redirecting confused people you leave them a good impression and they might stop to read your article if they also like doing comics art!

# Start an e-zine for your web site.

1. When people read each issue they'll be reminded to revisit your web site. Submit it to all the free e-zine directories on the internet.A news letter!

# Start your Own online discussion community.

1.  It could be an online message board, e-mail discussion list or chat room. When people get involved in your community, they will regularly return to communicate with others.

# Advertise your site at free classified ad sites.

1. There are many of these on the net. Some of the more popular ones are craigslist, inetgiant, freeadvertisingforum, and gumtree.

# Join free safe-lists.

1. These are lists of subscribers who have opted-in to send and receive emails to each other. You can instantly reach potentially thousands of people by sending out emails, and you don't have to worry about receiving spam complaints either because everyone on the list has opted-in to receive emails.
2. Getting a myspace page could also increase your site traffic because hundreds of people will see it.
3. Constantly update content on your web-page, so having a news section is a great deal for search engines especially.

# Update your Facebook status to let your friends know everytime you update your blog and create a Facebook fan page. 

1. Your friend's friends will see when they join the fan page or comment on your status.

2. Submit your website to top social bookmarking sites to create a back link to your website, which will increase you page rank as well.

3. Sign up to yahoo answers and leave great helpful comments to questions people are asking for, leaving a link back to your site with more helpful tips on it.

# Stay on topic. 

1. All this socializing, forum commenting and question answering ought to be on your website's main topic. The more your activity and site content match in topic, the more likely the right people find it. The more targeted your affiliate links are to the topic, the better you'll do with them too. People don't mind advertising that's on topic, it starts to look like a convenience directory rather than irritating commercials.

Tips:-

  • Use word of mouth. Tell everyone you know about your website.
  • Create Business Cards that have something like "This card is worth $400,000. Let me show you how" then have your url at the bottom of the card. There are websites out there that allow you to create and receive business cards for free.
  • Whatever types of free advertising you decide to pursue, make sure that you use ad tracking software. This will allow you to track where your visitors are coming from, and what types of advertising are the most effective.
  • Start right here on HowFind. Read up on how to publicize your website on Howfind without breaking the rules. If you can provide quality content, you can create a win-win relationship where you share knowledge and get publicity in return.
  • Choose your email settings wisely no matter which free advertising outlet or method you decide on.

Warnings:-

  • Steer clear of any advertising tactics that could be construed as spam.
  • Don't try to use meta data with the keywords that has nothing to do with your content because Google will bring your rank down.
  • Beware of free advertising and traffic swapping. Choose who you advertise with carefully. Check out the site and do a Whois search on anyone that wants to site swap with you prior to agreeing to swap sites.
  • Keep all free ads directed to your business information while setting up an account on Craigslist or other free advertising site. If you decide to advertise for free on Craigslist, make sure your email settings are safe. Use your web site's email at all times. Set your advertising to target only the country(s) with whom you want to do business with when initially setting up your free account. Otherwise there is a high chance that you will be bombarded with mass amounts of spam of the worst kind. If you make the mistake of using your own personal contact information, including email address during set up of your account, you'll likely receive all the usual spam from a Nigerian Prime Minister needing to transfer money (in order to try to extract your bank account information). You may even receive a fake check in the mail for money. This can happen to anyone when listing a personal item for sale. The moral is: Do not post personal information for all to see on Craigslist and other free advertising venues. These same issues happen with traffic exchanges as well (see next).
  • Be careful who you choose to exchange sites with. Be picky. It is your reputation on the line. The bottom line is to keep it all business when using free advertising and other site promotion options.

Related Posts Plugin for WordPress, Blogger...

Labels

404 AdBlock Add-on Airtel GPRS Trick Airtel SMS Trick Alexa Amazon Amazon Kindle Amazon Prime Android Android 8 Android Oreo antivirus Apple Apple Mac ASCII Audacity Audio Authotkey Backup Balance Transfer in Vodafone Battery Bing Blogger Blogging Bookmarklet Browser Camera Chromebook clock Cloud colors command lines Computer Computer Tricks configuration Contact Creative Commons Credit Card CSS devolop DIY Doodle DOS Download Dropbox E-Mail eBook Email Email Attachment Embed Encryption English Error Evernote Eyes Facebook Facebook Tricks Feedburner Flipkart Font Foursquare Free Internet Free sms trick in Vodafone G Mail Gadget Game Getty Images GIF Gists Github Google Google AdSense Google Analytics Google Apps Google Chrome Google Contacts Google Currents Google DNS Google Docs Google Drive Google Earth Google Font Google Forms Google Images Google Map Google Photos Google Play Store Google Plus Google Print Google Reader Google Script Google Sheets Google Spreadsheet Google Translate GPRS Setting GPS Hacking Health App HelloFax Hindi Hoodie HTML Icons idea Image Editing Images IMEI Indian Railways Infographics Instagram Internet Internet Explorer Internet Tricks iOS iPad iPhone IRCTC iTunes iTV JavaScript JioCinema JioTV Junglee Kindle Language Translation Laptop Laptop. TV Life Time FREE GPRS Life-Style Link Linkedln Linux logo Make Money Online Microdoft Powerpoint Microdoft Word Microsoft Office Microsoft Outlook Mobile Mosaic Music Name Networking nexus Notepad OCR Online Shopping Open DNS OS Outlook Password PDF Petya Phillips Hue Lights Photogtraphy Pixel Play Station Podcasts Pokemon Pokemon Go Polls Print Productivity Proxy Server Pushbullet QR Code Ransomware Reddit Reliance Hack GPRS Reliance Jio RGB Ringtone Router RSS Safe Mode Samsung Galaxy S Scrabble Screen Capture Screen Sharing Screencast Secrets Security Send free sms from PC SEO Sierra Skype Slideshare SMBv1 SMS Snapchat Snapdeal Social Media Solution Sound Device Speech Recognition Sql Steam Sync Synology NAS Tata Docomo GPRS trick Teleprompter Torrent Trick Tricks TV Twitter UltraISO Unicode Unknown Extension Unlimited 2GB Unlimited 3GB Unlimited GPRS USB USB Security Key Video Editing virtual desktop Virus attack VLC Vodafone 110% working trick for GPRS Vodafone 3g Vodafone GPRS VPN wallpapers WannaCry Web Design Web Domain Website Wget Whatsapp WiFi Wikipedia Windows Windows 10 Windows 10 S Windows KN Windows Tricks windows updates Winows N Wolfarm Alpha WordPress XBox YouTube Zip
Twitter Delicious Facebook Digg Stumbleupon Favorites More